Resend Integration Guide
What is Resend?
Resend is the Developer-Friendly Email API.
Integrate Resend into your EZsite project to send emails. Once configured, signup emails will automatically use your Resend API key for delivery.
How to Integrate Resend?
1. Create/Login to Resend Account
Register at resend.com/signup or sign in.
2. Generate API Key
- Go to API Keys: resend.com/api-keys
- Click Create API Key (top-right).

- Configure permissions/domain and click Add.
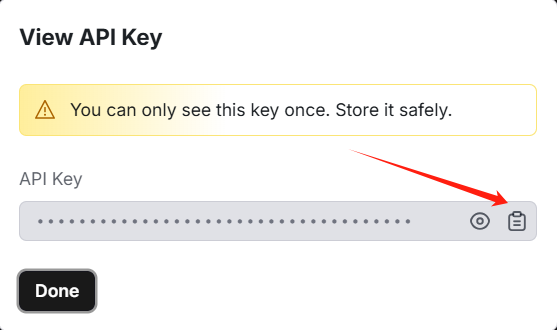
- Copy the API key:
3. Configure EZsite Project
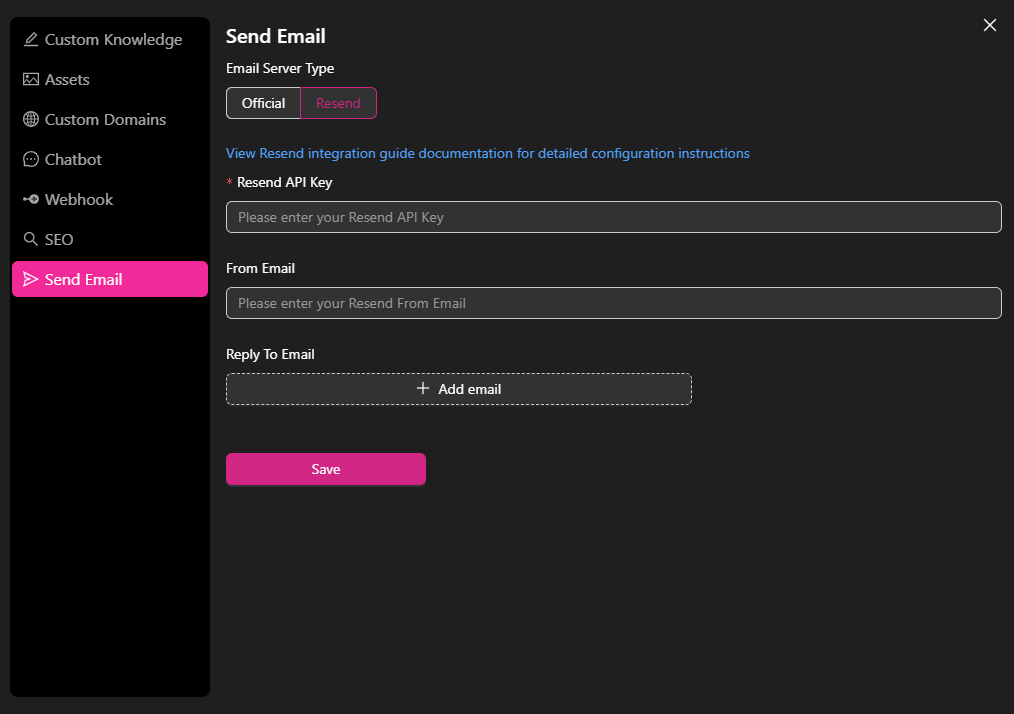
- In your
EZsiteproject Settings:- Paste API key
- Enable Resend
- Configure optional fields:
From AddressReply-to Email
Before going to production
- Verify your domain at resend.com/domains
- Use a
fromaddress with your verified domainTesting Limitations
- ❗ From Address: Must use
@resend.devdomains (e.g.,onboarding@resend.dev)- ❗ To Address: Limited to your Resend account email
Verify Your Domain In Resend
Required for production use
1. Add Domain
- Go to Domains → Add Domain.
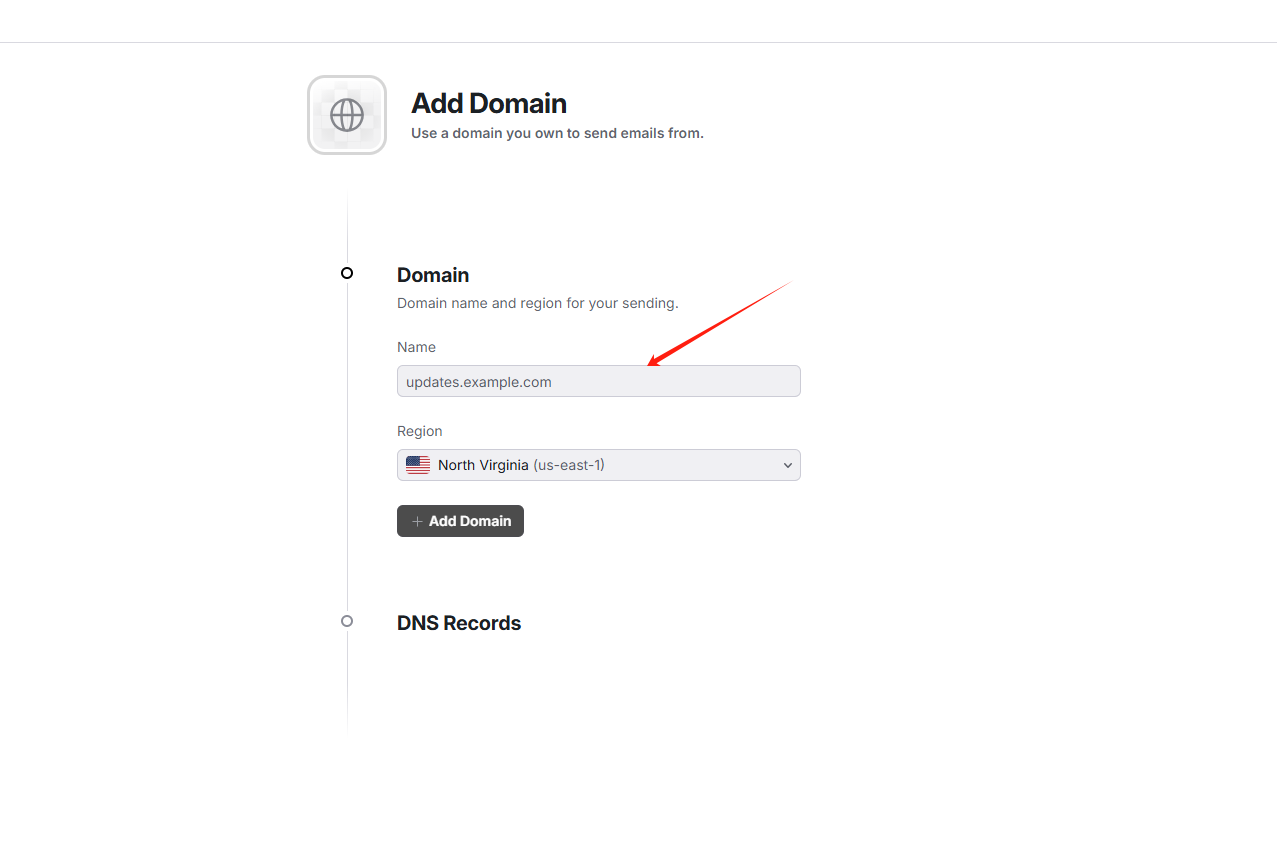
- Enter your domain (e.g.,
yourdomain.com).
2. Configure DNS Records
Choose one method:
Automatic Setup (Cloudflare)
- Click the "Sign in to Cloudflare" button.
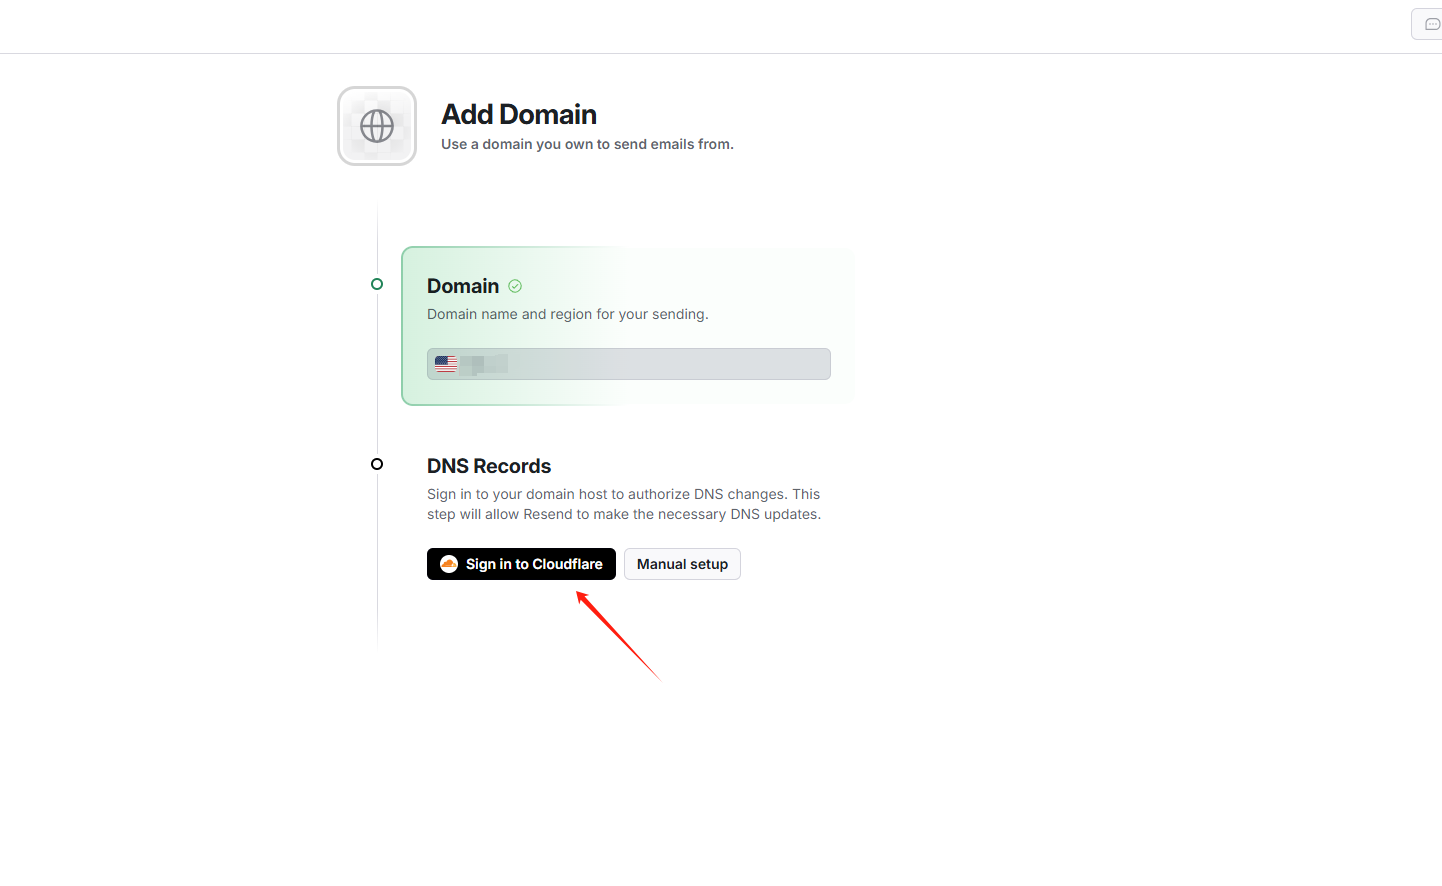
- In the pop-up window:
- Log in to your Cloudflare account (if prompted).
- Click Authorize to grant Resend permission.
- Resend will automatically add and verify DNS records on your Cloudflare-managed domain.
Manual Setup
- Copy the provided DNS records (TXT/MX):
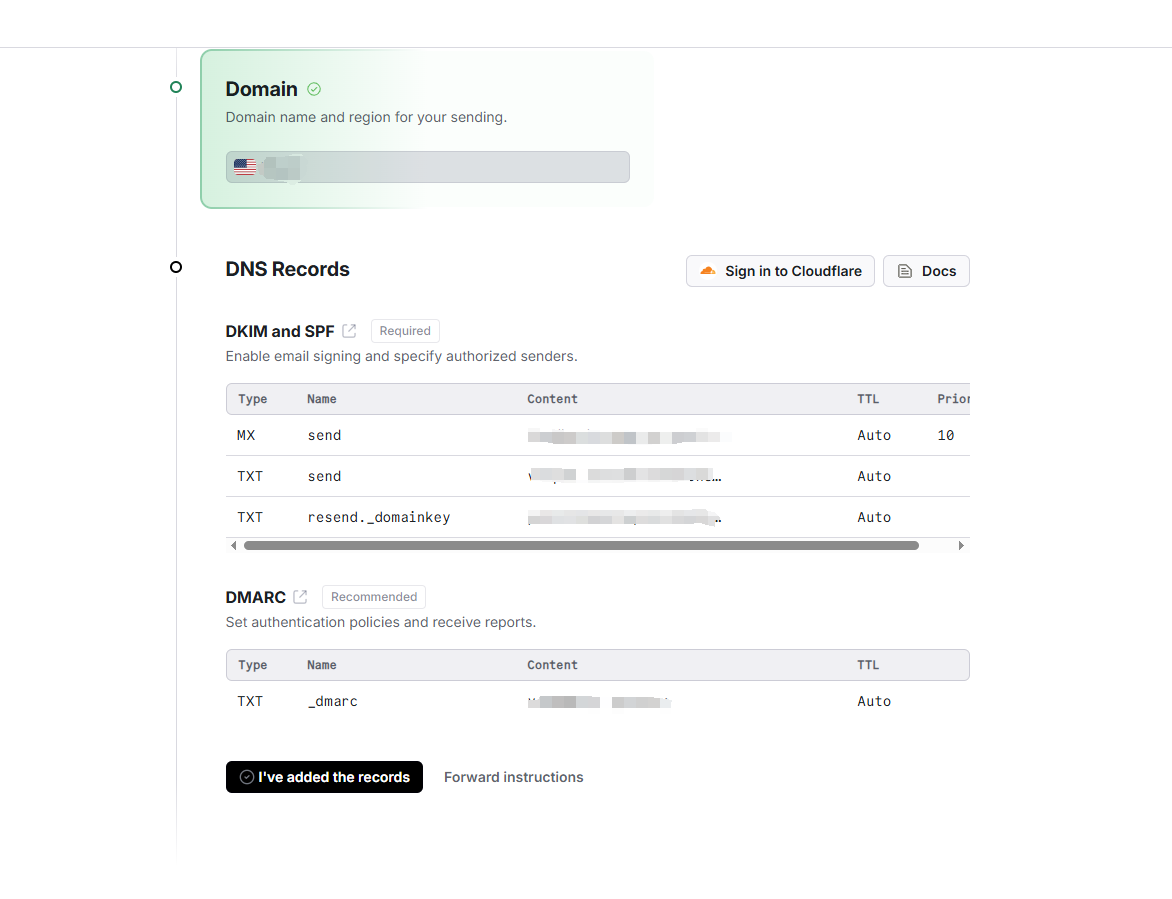
- Add them to your domain registrar's DNS settings.
3. Verify Status
- Check verification status (typically takes 5-60 minutes):
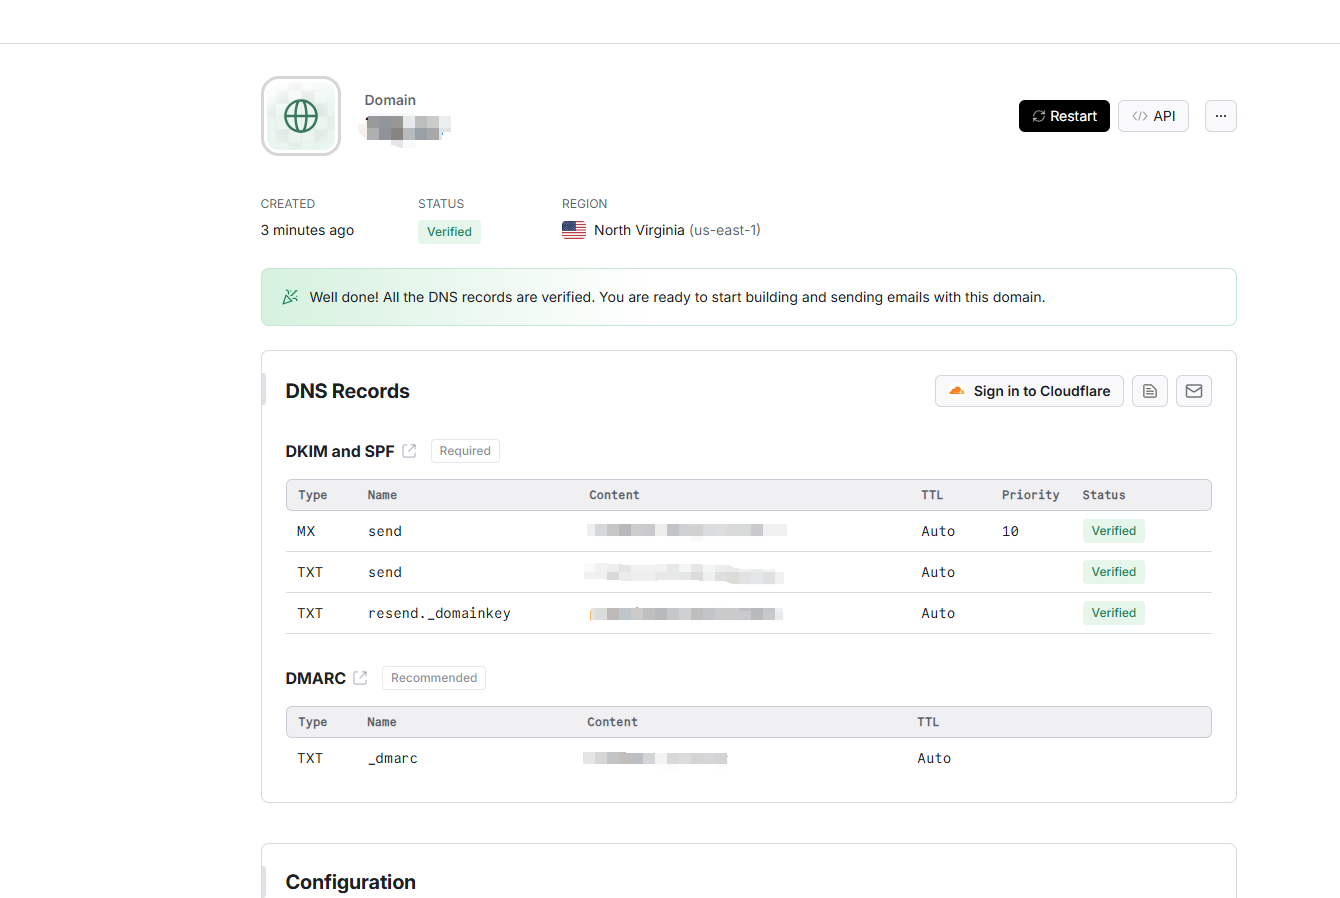
- Once verified, use
from@yourdomain.comaddresses freely.
Next Steps
- Update your
EZsiteFrom Addressto use your verified domain - Send emails to any recipients