Stripe Integration
How to Integrate Stripe?
There are multiple ways to integrate Stripe into your EZsite project. The most straightforward way is to use Stripe's built-in payment links for simple and fast checkout.
Use Stripe Payment Links
To streamline your checkout process, consider using Stripe Payment Links. These no-code solutions make it easy to create a fully functional checkout process. You can easily integrate them directly into your website.
- Log in or create your Stripe account if you don't already have one.
- Visit your Stripe dashboard. In the top right corner, there is a switch for test mode, make sure test mode is off.

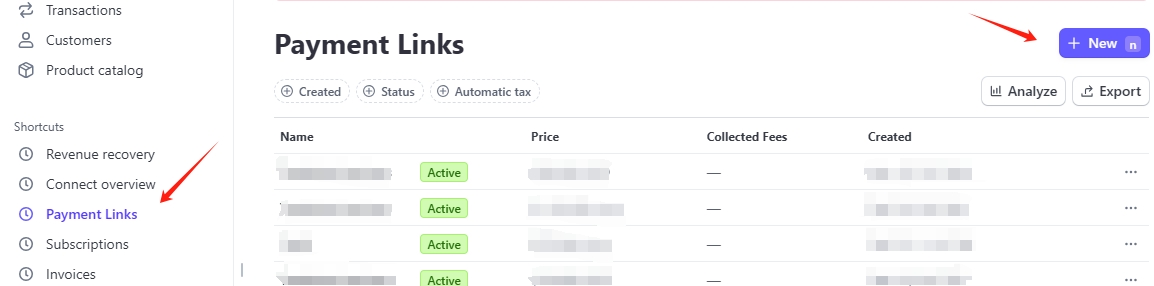
- Create a Payment Link by clicking Payment Links > New.
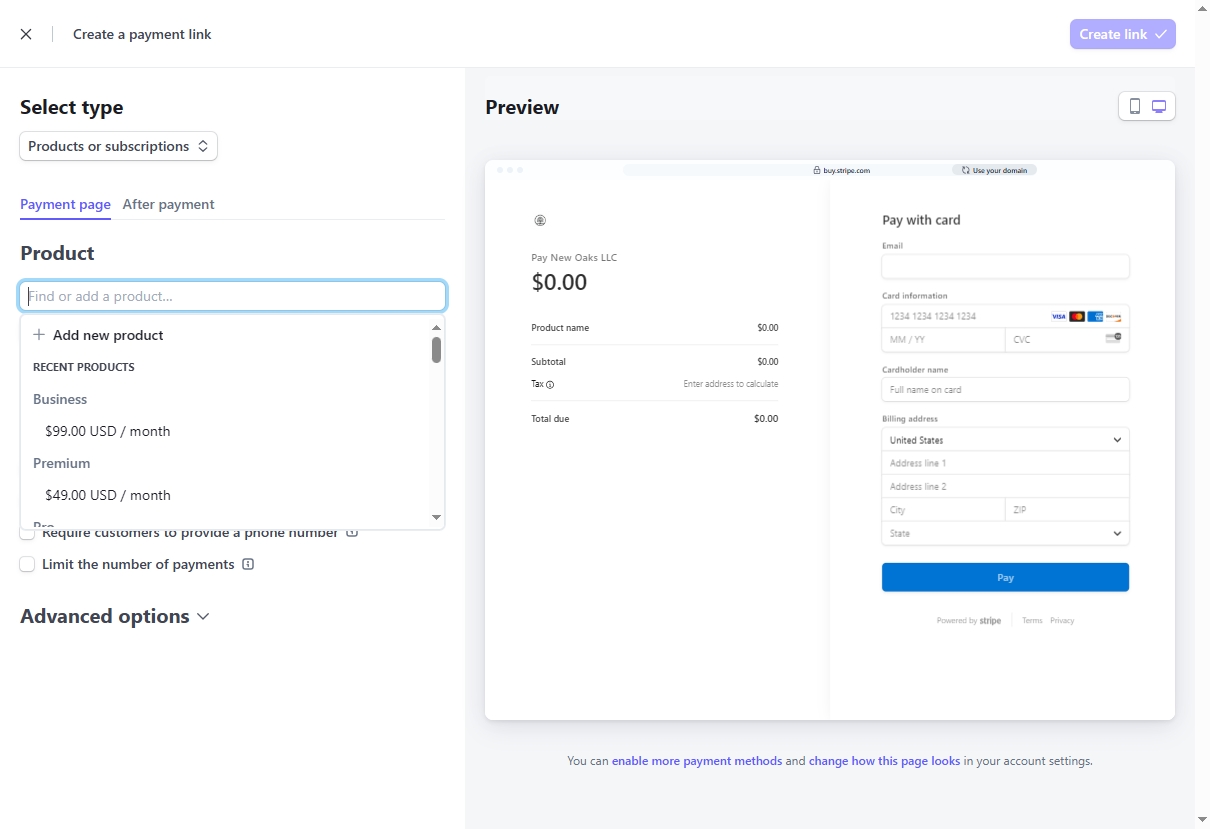
- Configure products and options. Select a previously created product, or add one or more products if you don't have any yet. You can also adjust other options, such as whether to collect the customer's address or phone number, to customize the checkout experience. For more information on customization, refer to the Stripe documentation.
- Copy the Payment Link and bring it over to
EZsite.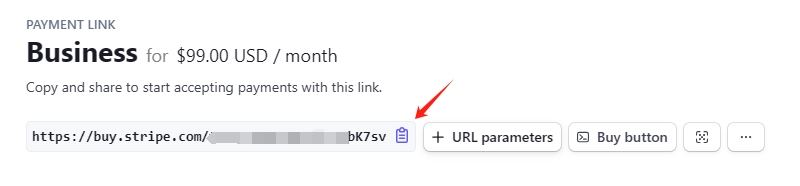
- Use the following prompt in
EZsiteto integrate the link:
add Stripe payments to my app using this payment link: [your payment link]
Advanced Integration: Webhooks & Database
Enable Database
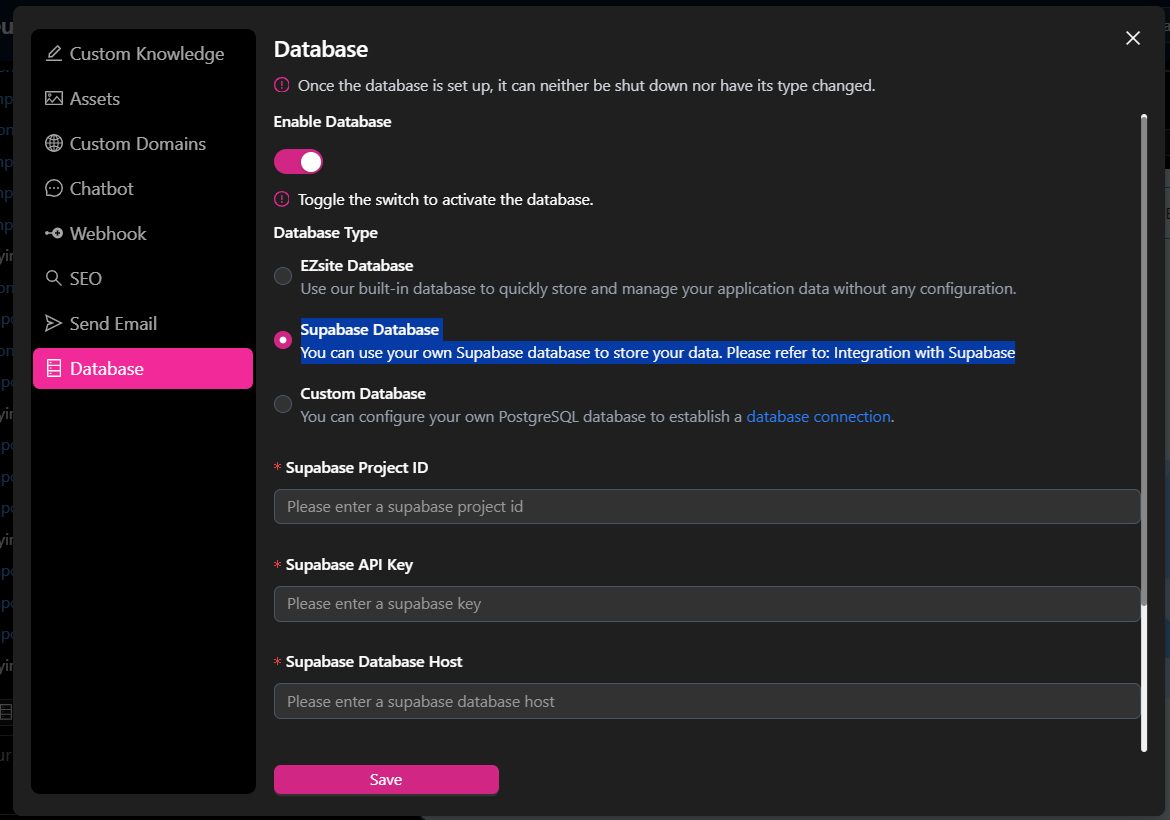
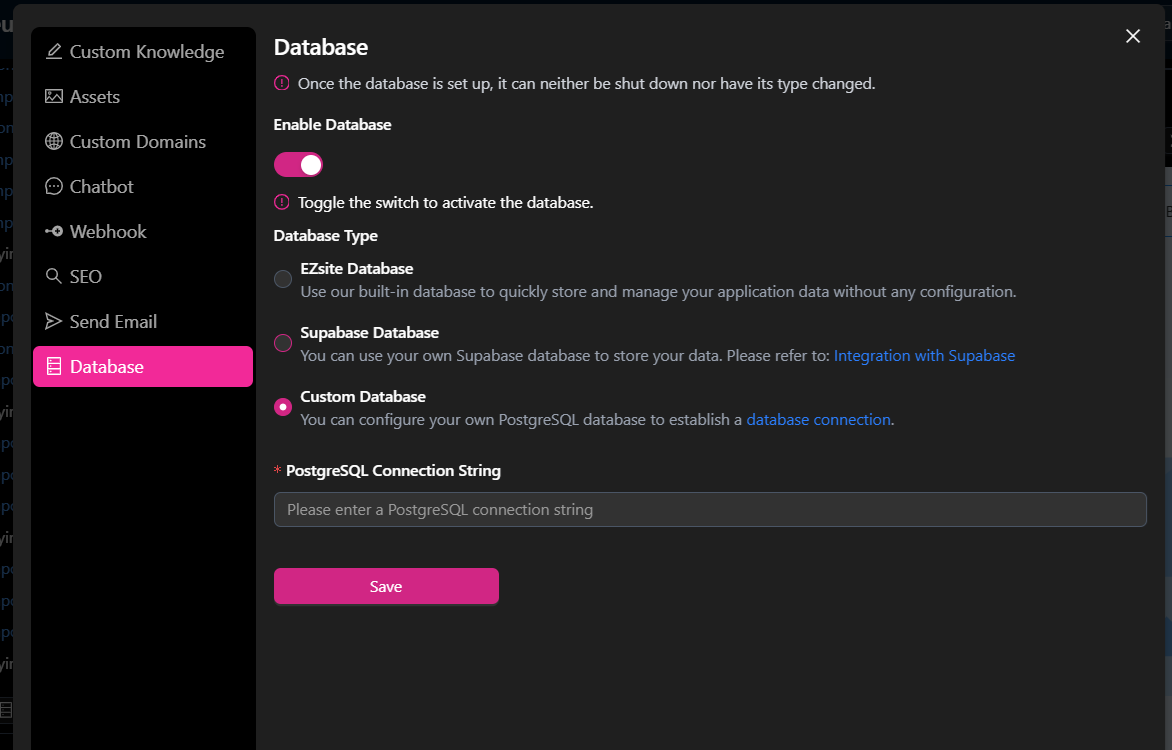
We offer three options for connecting to a database: (Note: Once the database is set up, it can neither be shut down nor have its type changed)
EZsiteDatabase: Click "Enable Database" button, choose "EZsite Database" Database Type, it Leverages our built-in database for effortless data storage and management, requiring no additional configuration.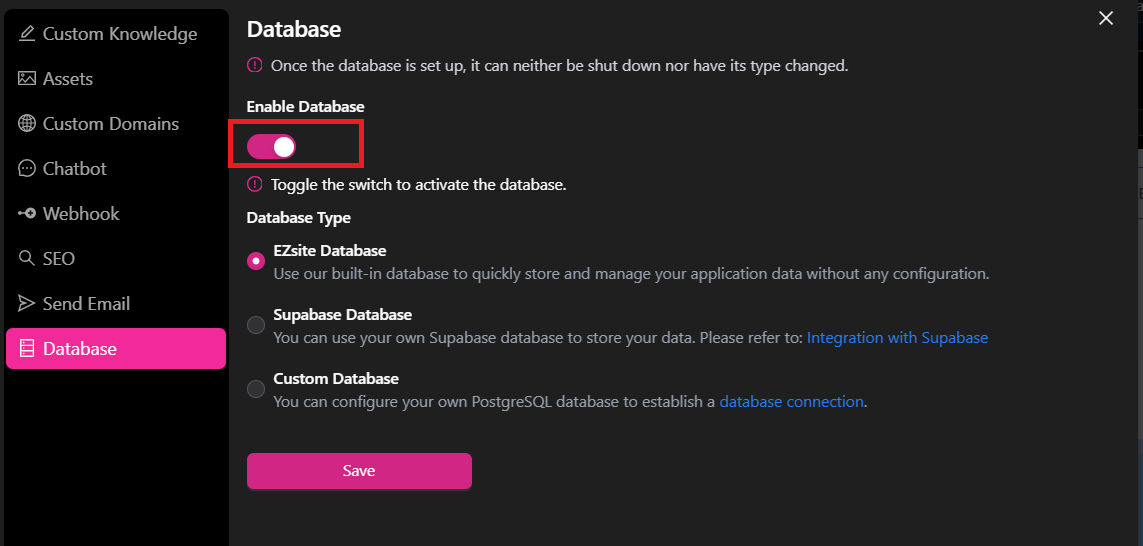
- Supabase Database: Click "Enable Database" button, choose "Supabase Database" Database Type, Connect your own Supabase database to store and manage your application data. Level up with advanced features like subscriptions, real-time updates, and third-party authenticationFor setup instructions, visit: Integration with Supabase
- Custom Database: Click "Enable Database" button, choose "Custom Database" Database Type, You can set up your own PostgreSQL database to Connect and manage external PostgreSQL databases directly, with full SQL query support and enterprise-grade scalability. For setup instructions, visit: Set Up Custom Database
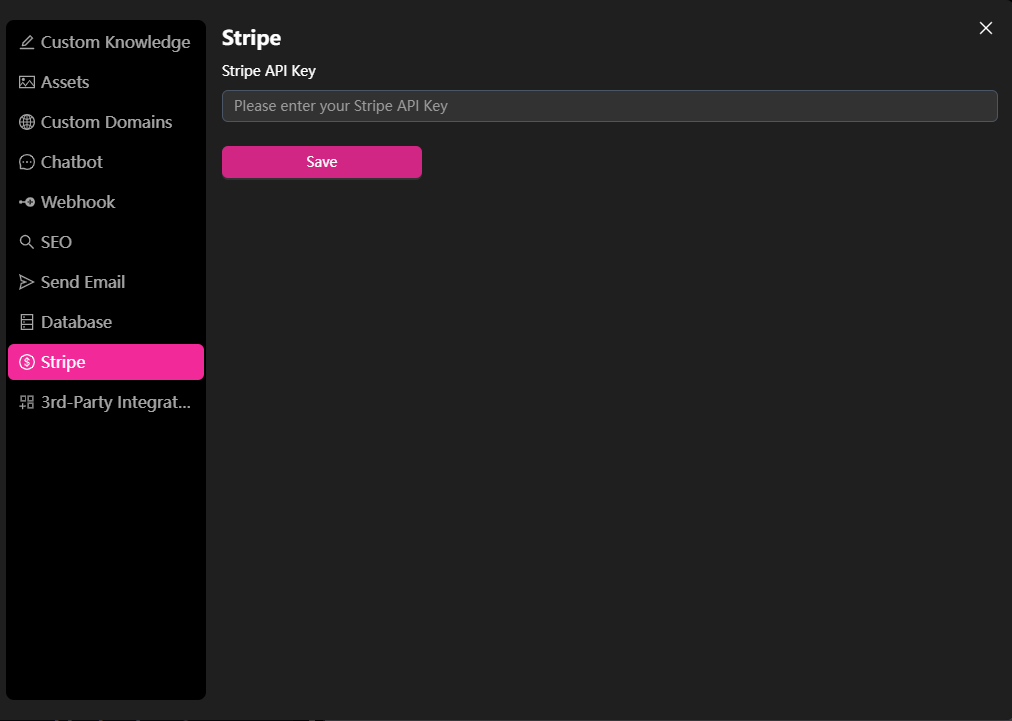
Securely Add API Keys
To integrate Stripe securely, avoid sharing your API key directly in chat. Instead:
- Go to Stripe Dashboard > Developers > API Keys.
- Copy the Secret Key (DO NOT paste it directly in Lovable chat).
- Use the
EZsite“Stripe” feature to securely store it.
Testing Your Integration
- Use Stripe’s Test Mode to safely test payments.
- Test card details:
- Card Number: 4242 4242 4242 4242
- Any future expiration date
- Any 3-digit CVC
- Deploy your app.