Quickstart
From first prompt to full-stack app
Overview of ezsite
Welcome to this comprehensive tutorial, where you'll learn how to create a full-stack application using ezsite. This guide will walk you through each step, from setting up your project to deploying a fully functional web application. This guide will help you harness the power of ezsite to build robust and scalable applications efficiently.
ezsite PLATFORM OVERVIEW
Create Your First Project
-
Step 1 To get started, head over to ezsite.ai and create an account.
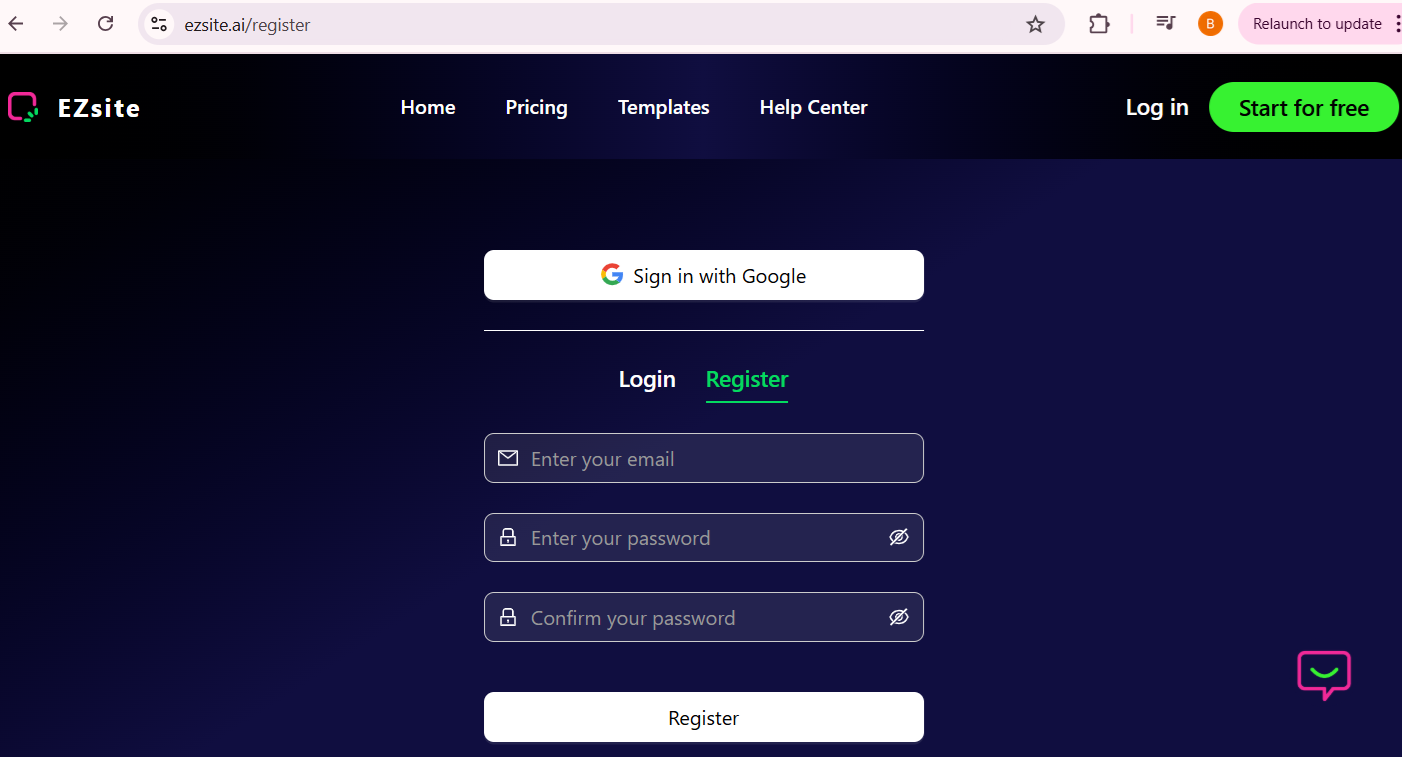
-
Step 2 Once registered, you’ll be able to login to create your first project.
-
Step 3 Begin by entering a simple initial prompt, and let
ezsitehandle the rest. This prompt serves as the foundation for any project withinezsite, empowering you to turn your ideas into reality instantly.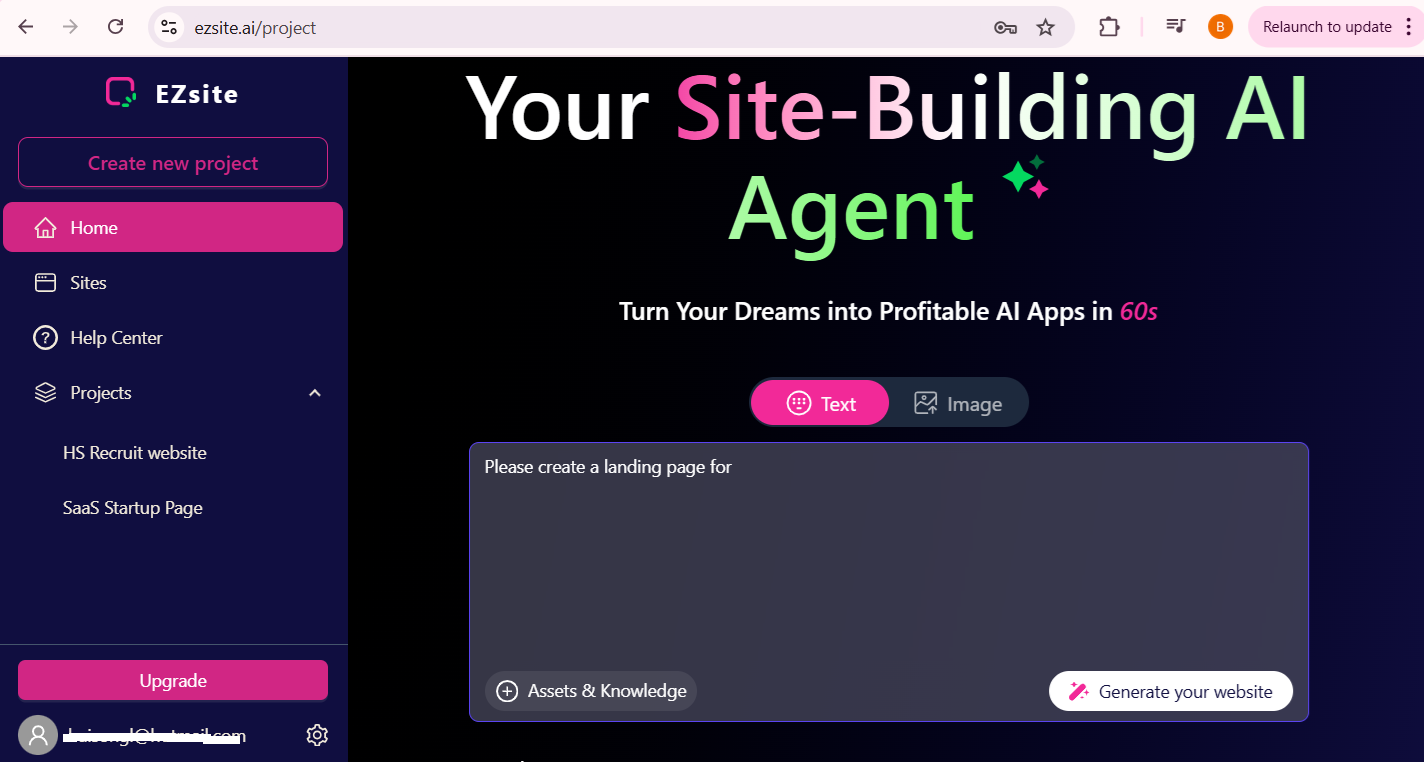
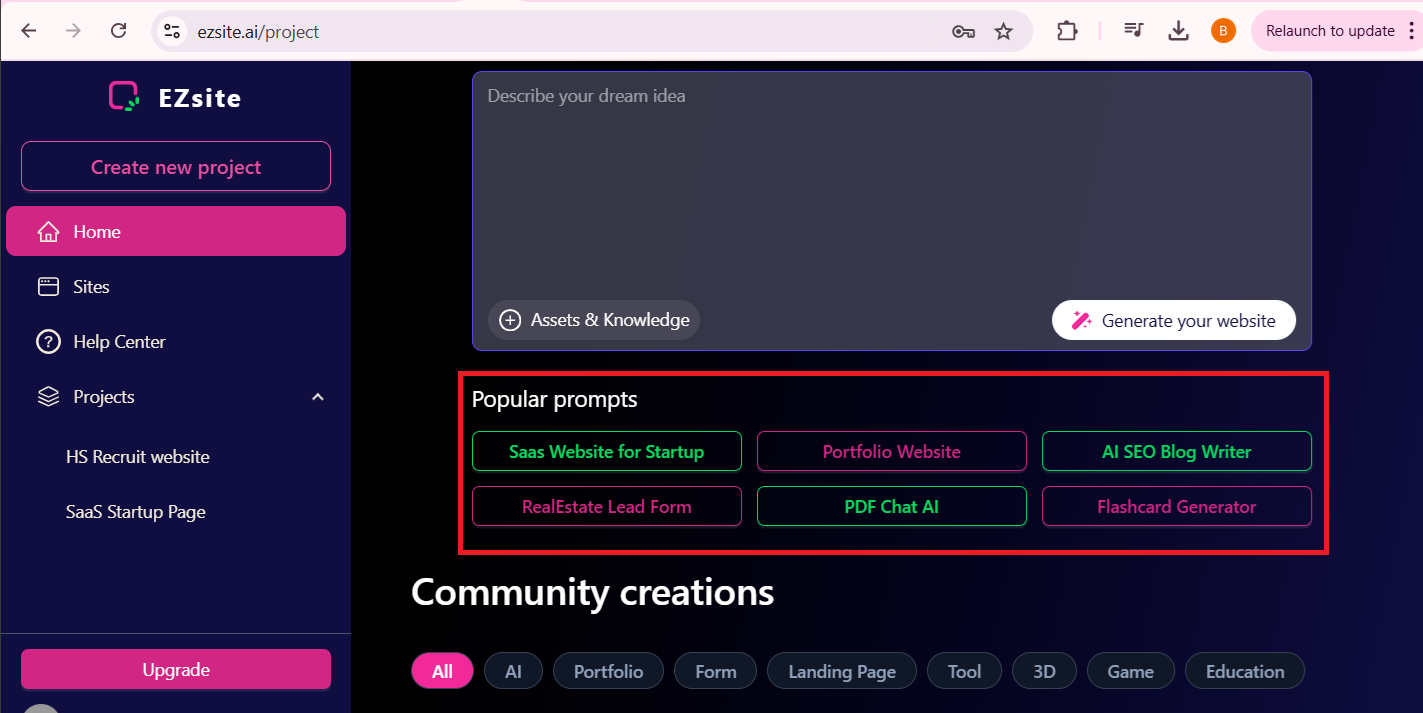
ezsite Dashboard
-
-
Here you kickstart your project with a single prompt.
-
Browse through your entire collection of projects, including the latest and featured ones.
-
Get started quickly with a template from our popular prompts and explore creations from the community.
-
Take control of your account by viewing and editing your profile. Tailor your settings to match your preferences.
-
Stay on top of your account details and adjusting your settings as needed.
-
Experiment with Labs features like Chat mode—toggle them on or off.
-
Upgrade or downgrade your plan with ease, adapting to your changing needs without interruption.
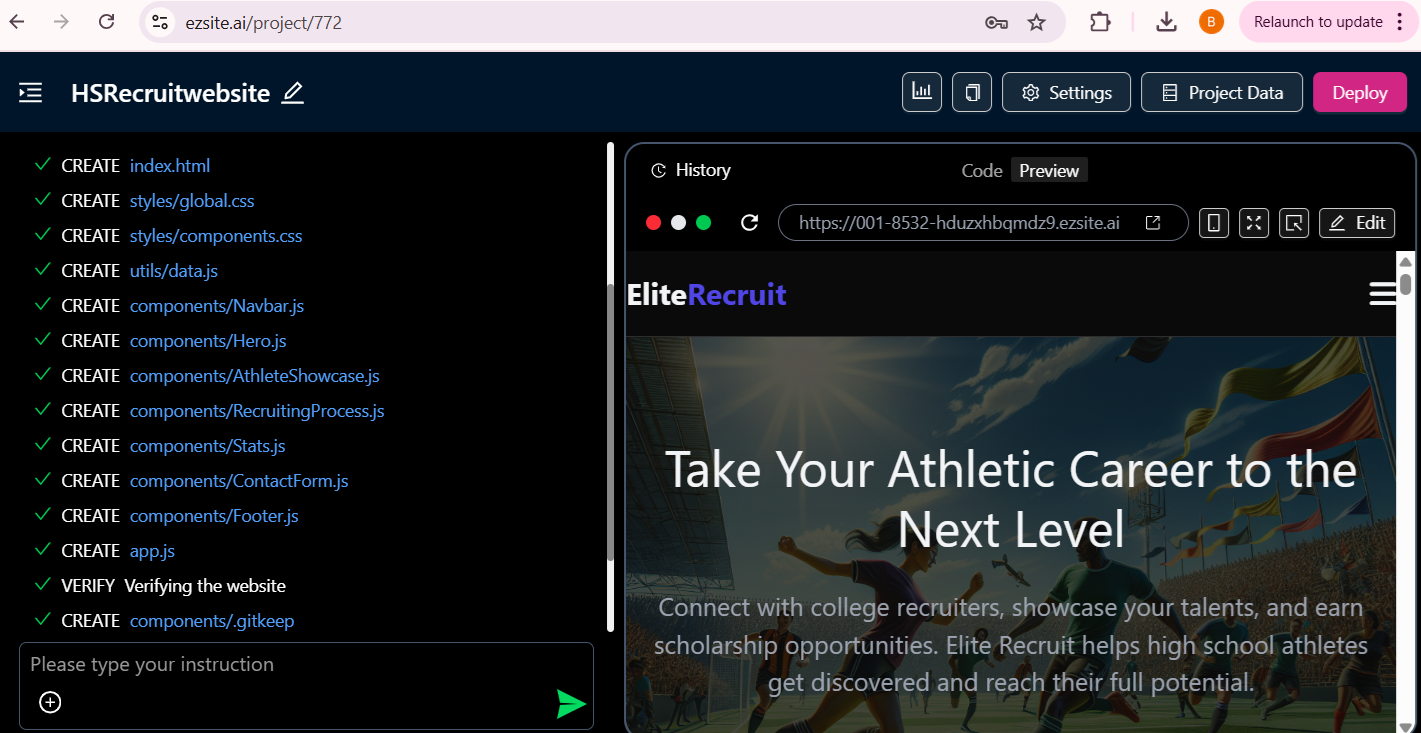
Project Overview: every project follows a structured workflow:
-
-
Effortless Editing: Utilize a chat-based interface for seamless modifications.
-
Visual Enhancements: Attach images or videos to enhance precision and inspire edits.
-
Component Editing: Select and visually edit components for a cohesive design experience.
-
Mode Switching: Easily toggle between edit mode and chat mode.
-
Version Control: Track changes with version history and restore previous versions as needed.
-
Navigation: Effortlessly navigate through project pages.
-
Backend Integration: Integrate with Supabase for robust backend capabilities.
-
Deployment: Publish, deploy, and share your project using a preview link (don't forget to re-publish after making changes).
-
Responsive Design: Switch between web and mobile views for optimal responsive design.
-
Instant Updates: Refresh the preview modal to see changes instantly.
-
Direct Access: Open your project directly using the preview link.
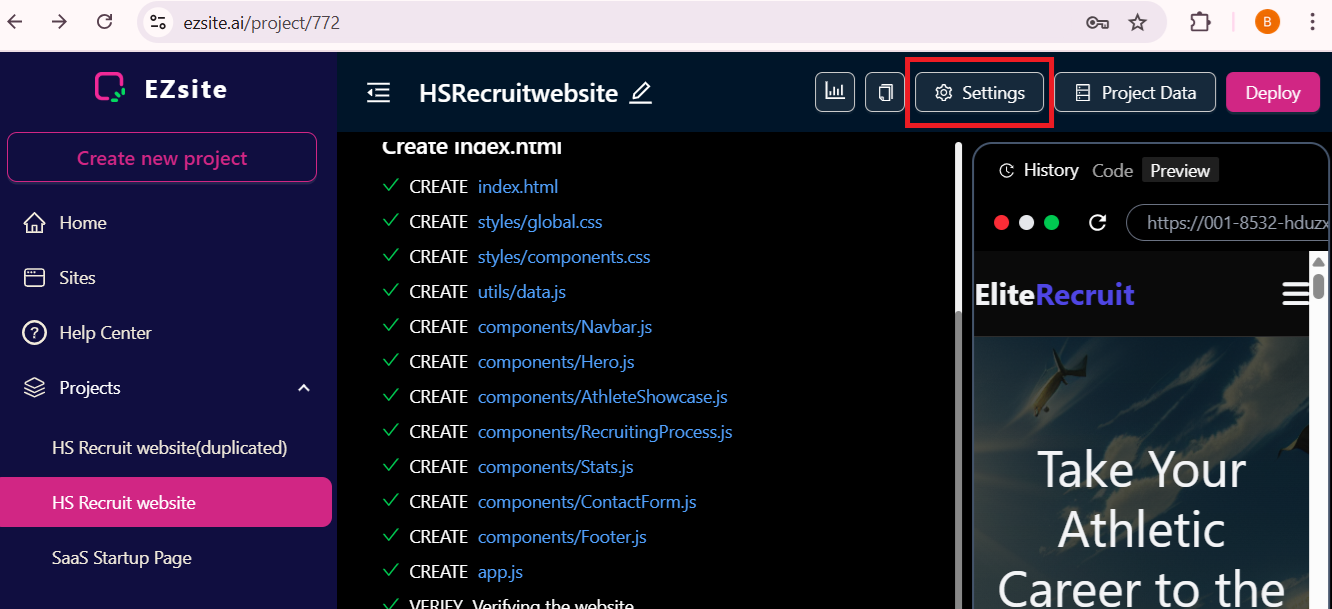
Project Settings
Each project's settings offer a range of capabilities. Click the "Settings" button to view the details.
-
-
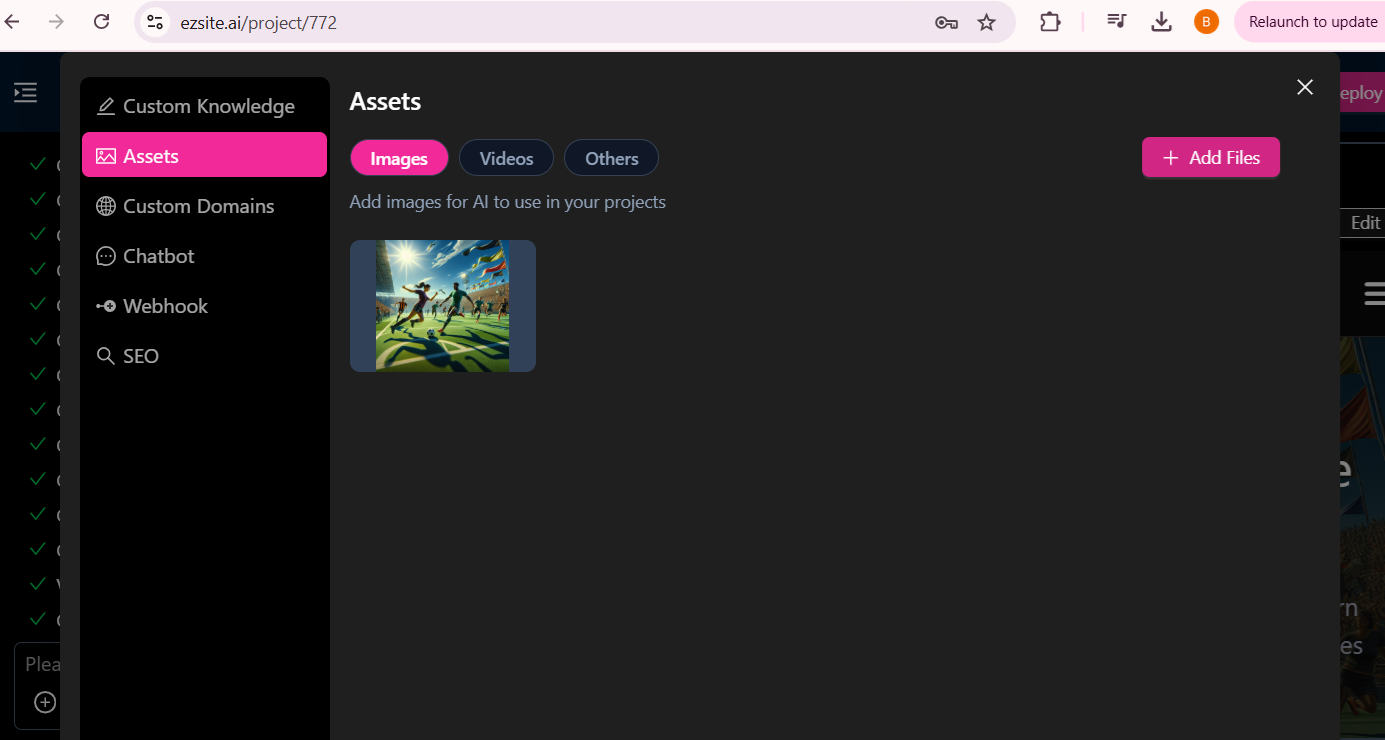
Custom Knowledge: Set up tailored knowledge to enhance your project's context.
-
Assets: where you can add your own images, videos, and other files to include in your app.
-
Webhook: You can add your webhook URL to instantly send user-submitted form data to your CRM in JSON format. A detailed document is also available to guide you through the webhook setup process.
-
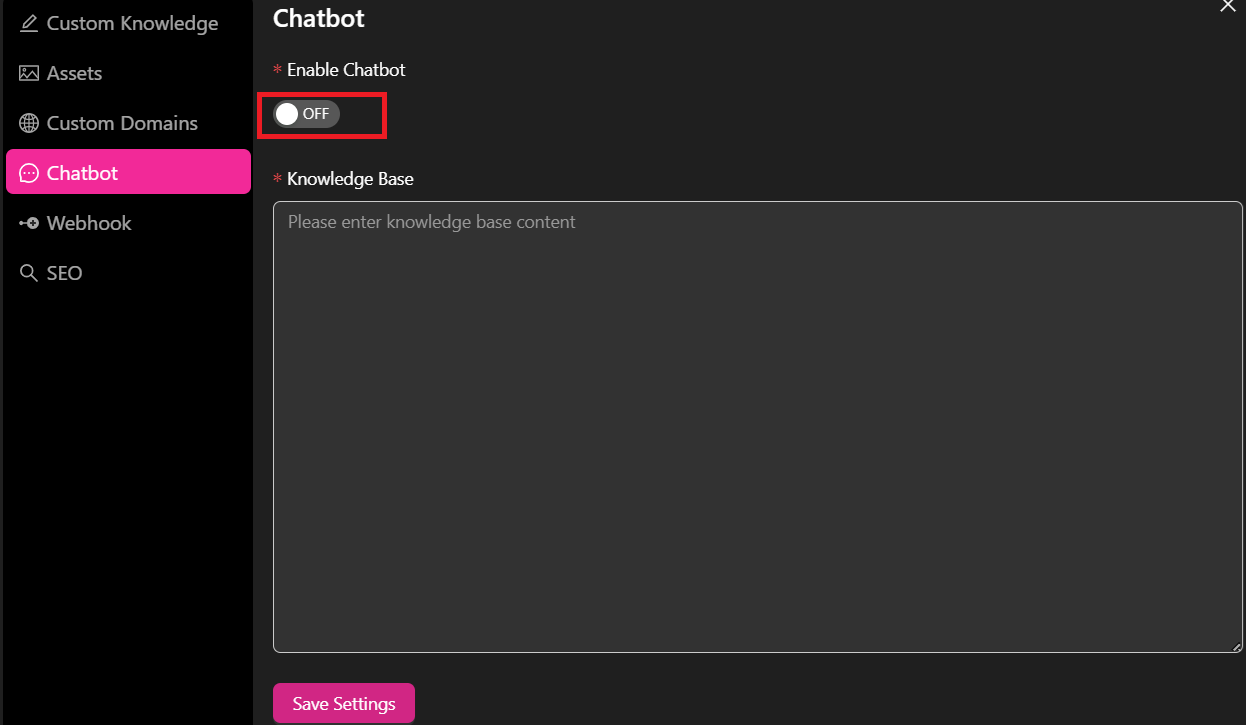
ChatBot: You can enable or disable the chatbot on your site and add knowledge to enhance its functionality.
-
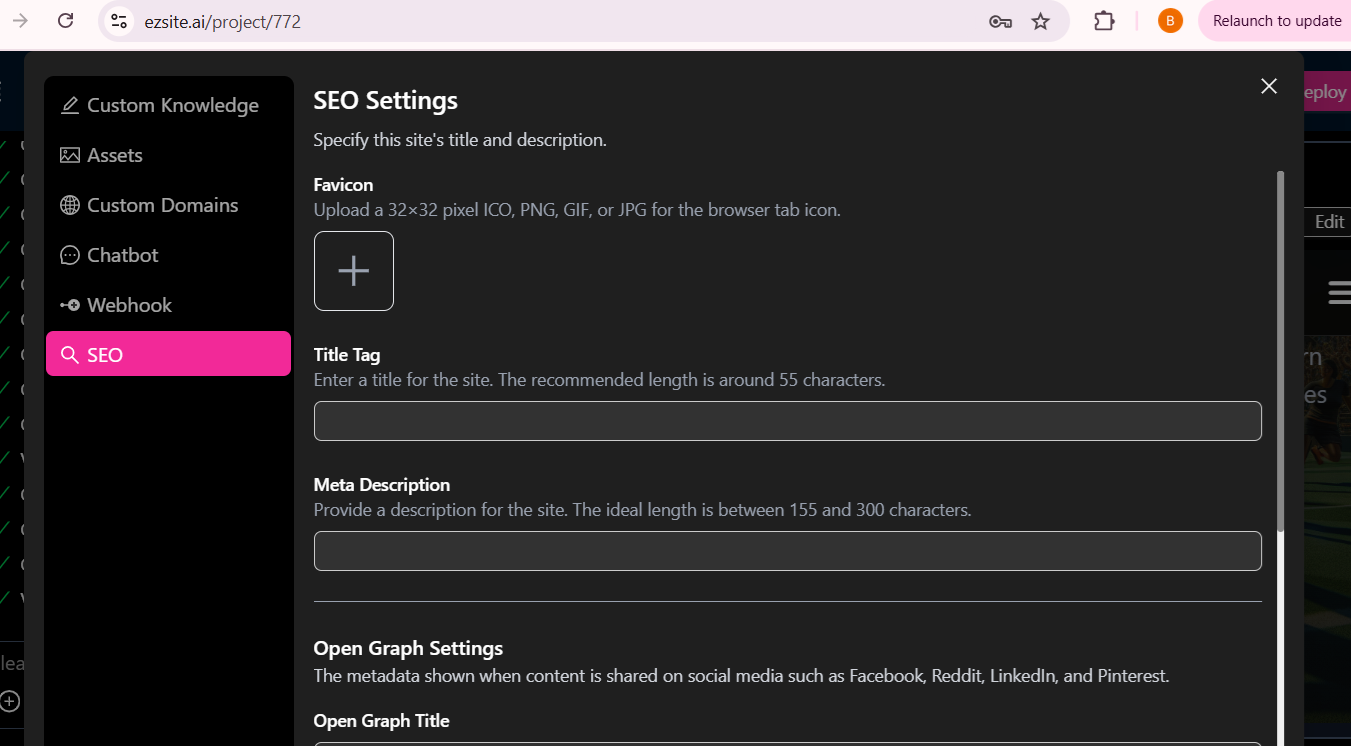
SEO: You can configure your website's SEO, improving its visibility and ranking in search engine results.
-
Send Email:
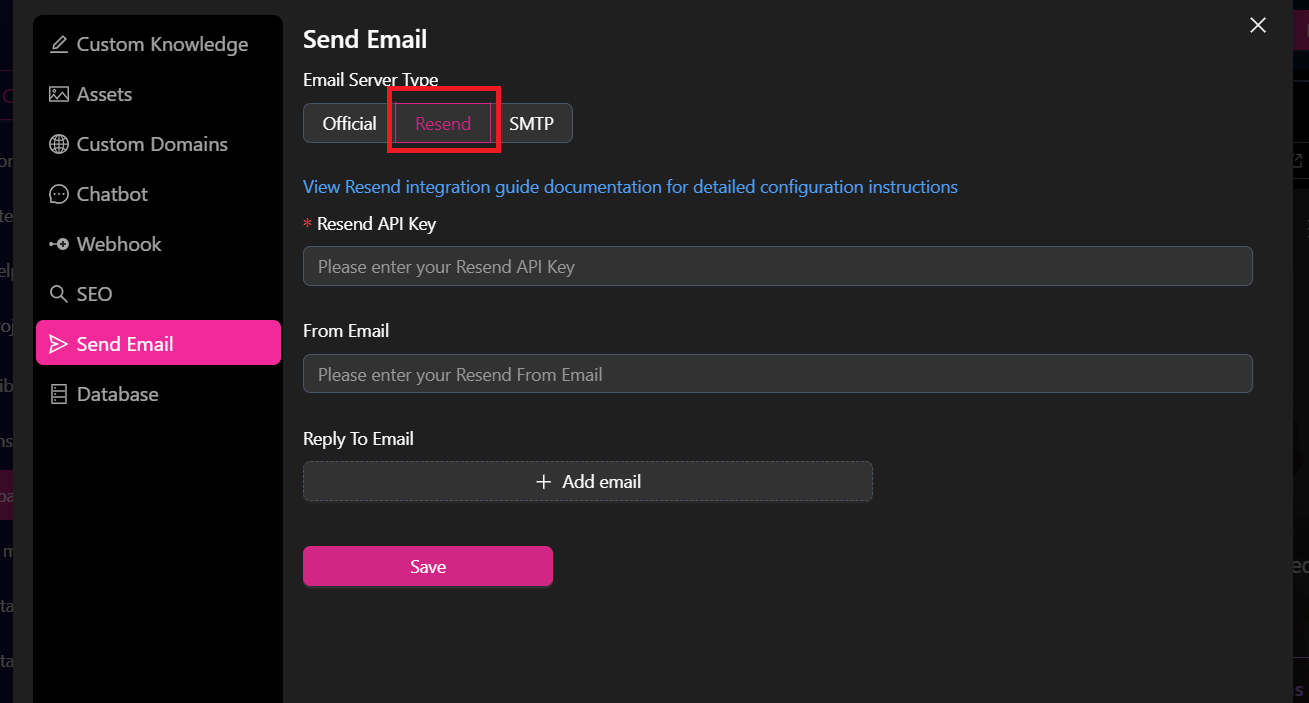
Official Send Email: Send Emails Usingezsiteemail server.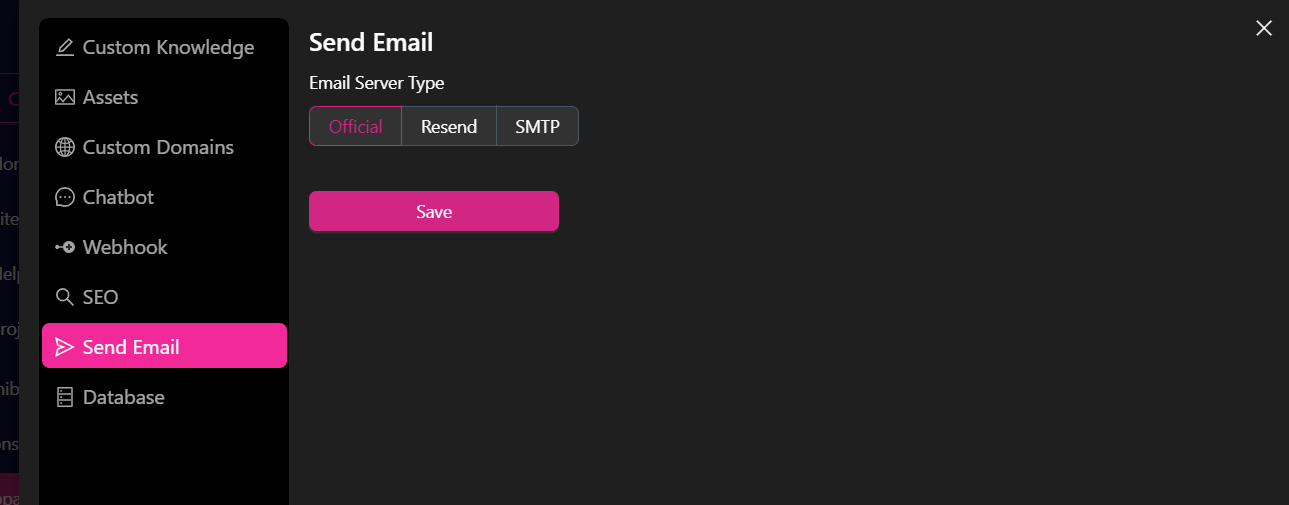 Resend: is a developer-friendly email API designed to simplify email integration. By incorporating Resend into your EZsite project, you can efficiently send emails. Once set up, your Resend API key will automatically handle the delivery of signup emails, ensuring seamless communication with your users.
here is a detail Resend Integration Guide
Resend: is a developer-friendly email API designed to simplify email integration. By incorporating Resend into your EZsite project, you can efficiently send emails. Once set up, your Resend API key will automatically handle the delivery of signup emails, ensuring seamless communication with your users.
here is a detail Resend Integration Guide
 Smtp Email Server: use an SMTP email server, you'll need to configure your email client (like Outlook, Thunderbird, or a web-based email service) with the correct SMTP server address, port (usually 587 or 465), and authentication details (username and password) provided by your email provider. Click the "Send Verification Code" Button: This will send a verification code to the email address associated with your account.
Enter the Verification Code: Once you receive the code, fill it into the "Verification Code" textbox.
Complete the SMTP Setup: Click "Save" to finalize the SMTP configuration.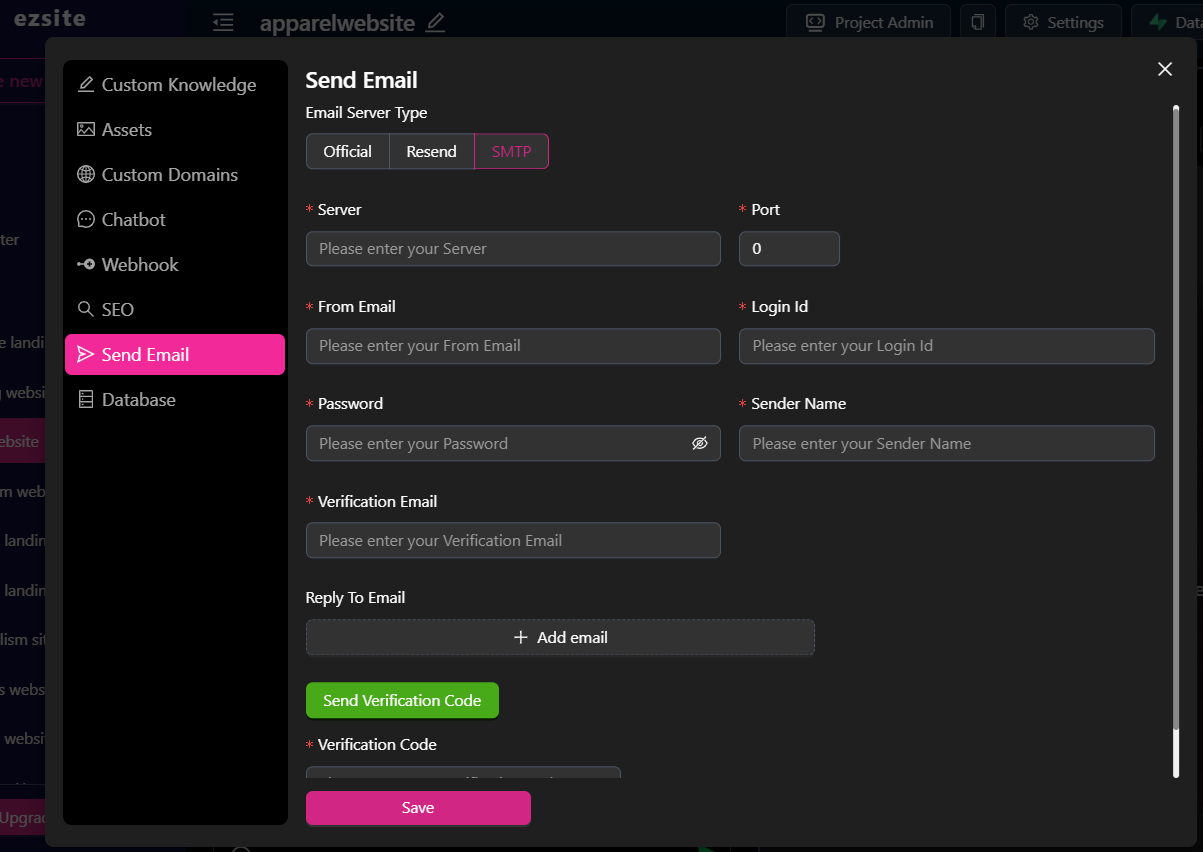
-
Database: We offer three options for connecting to a database: (Note: Once the database is set up, it can neither be shut down nor have its type changed)
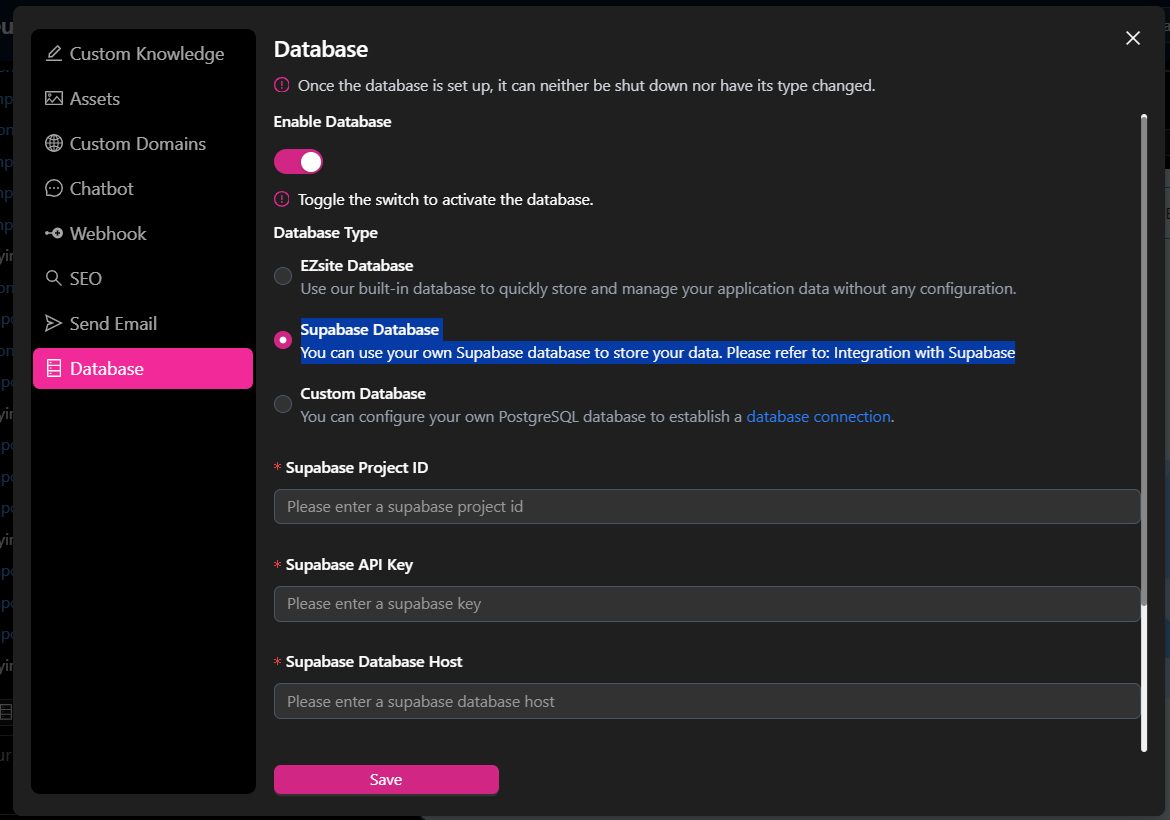
ezsiteDatabase: Click "Enable Database" button, choose "EZsite Database" Database Type, it Leverages our built-in database for effortless data storage and management, requiring no additional configuration.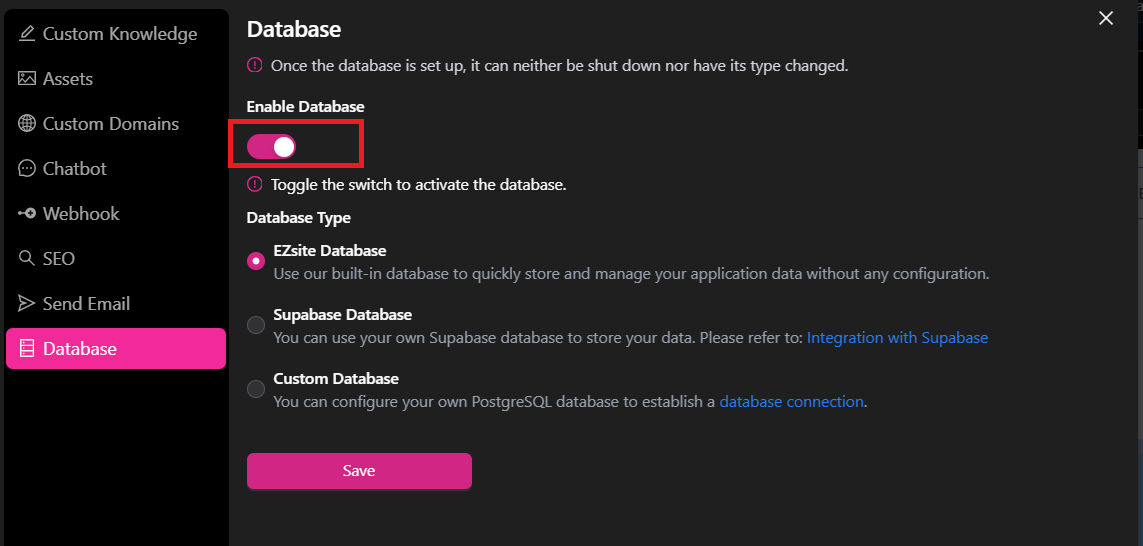 Supabase Database: Click "Enable Database" button, choose "Supabase Database" Database Type, Connect your own Supabase database to store and manage your application data. For setup instructions, visit: Integration with Supabase
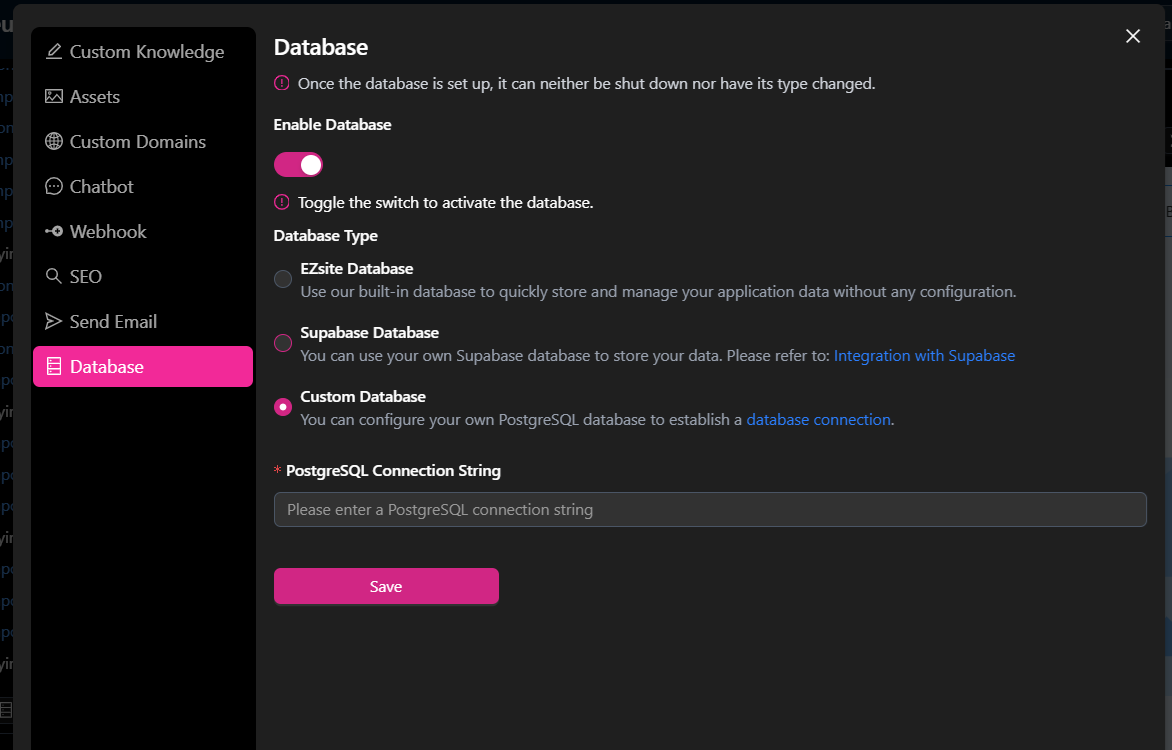
 Custom Database: Click "Enable Database" button, choose "Custom Database" Database Type, You can set up your own PostgreSQL database to establish a seamless database connection. For setup instructions, visit: Set Up Custom Database
-
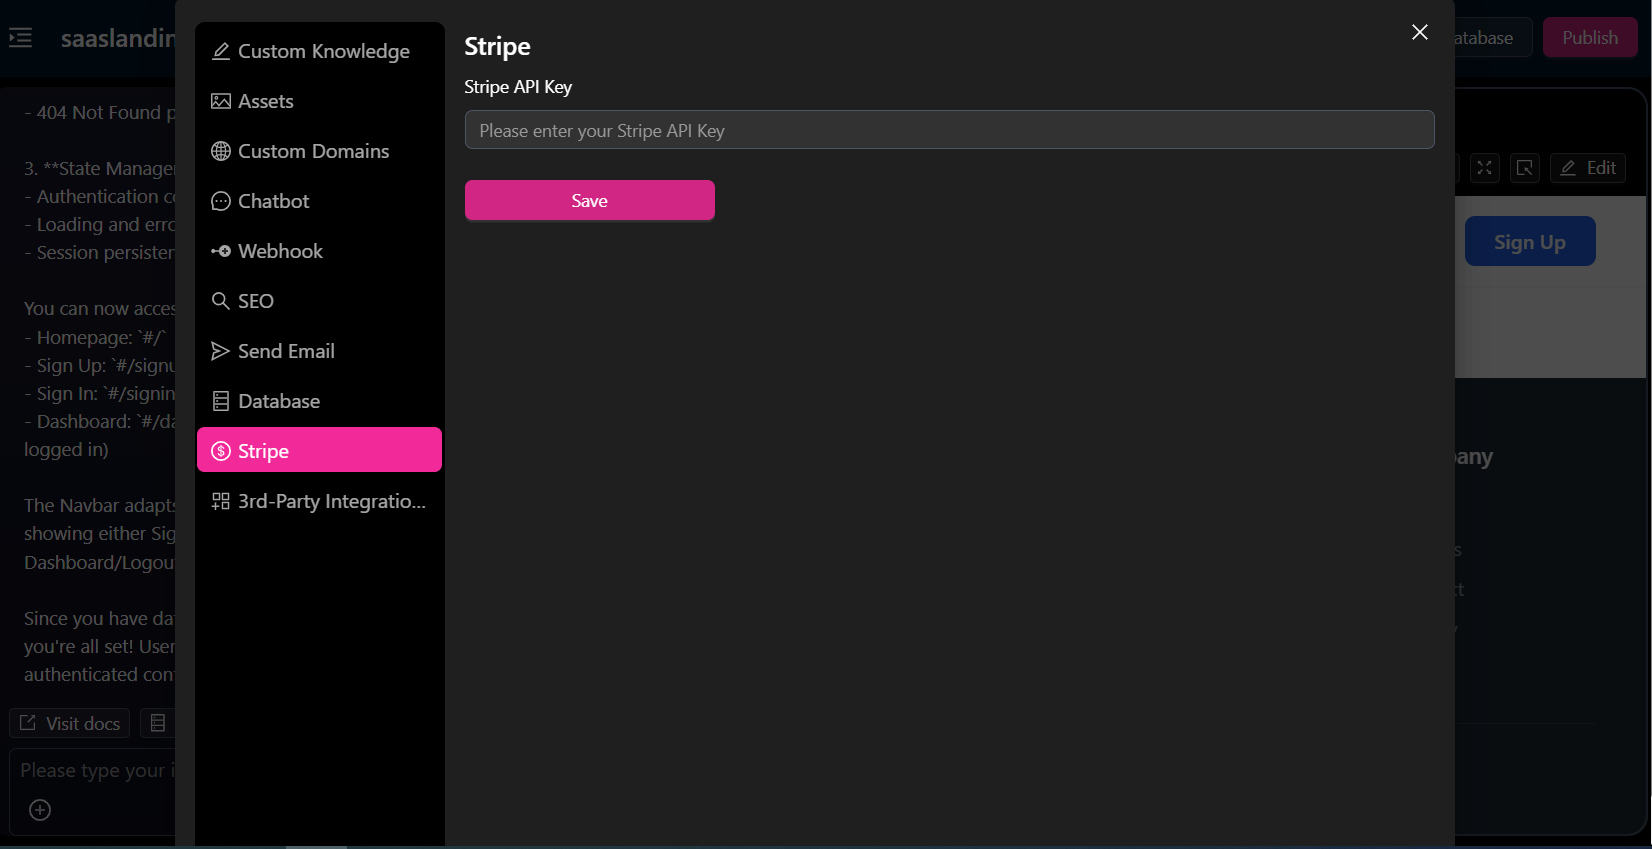
Stripe: Enter your Stripe API key and click the "Save" button to integrate Stripe payments into your project. For detail Stripe integration, please visit: Stripe Integration
-
3rd-Party Integrations:
ezsitelets you connect with your Google API, Google Maps API, and Facebook API. Simply enter your account’s authorization details and click the "Save" button to integrate your social accounts withezsite.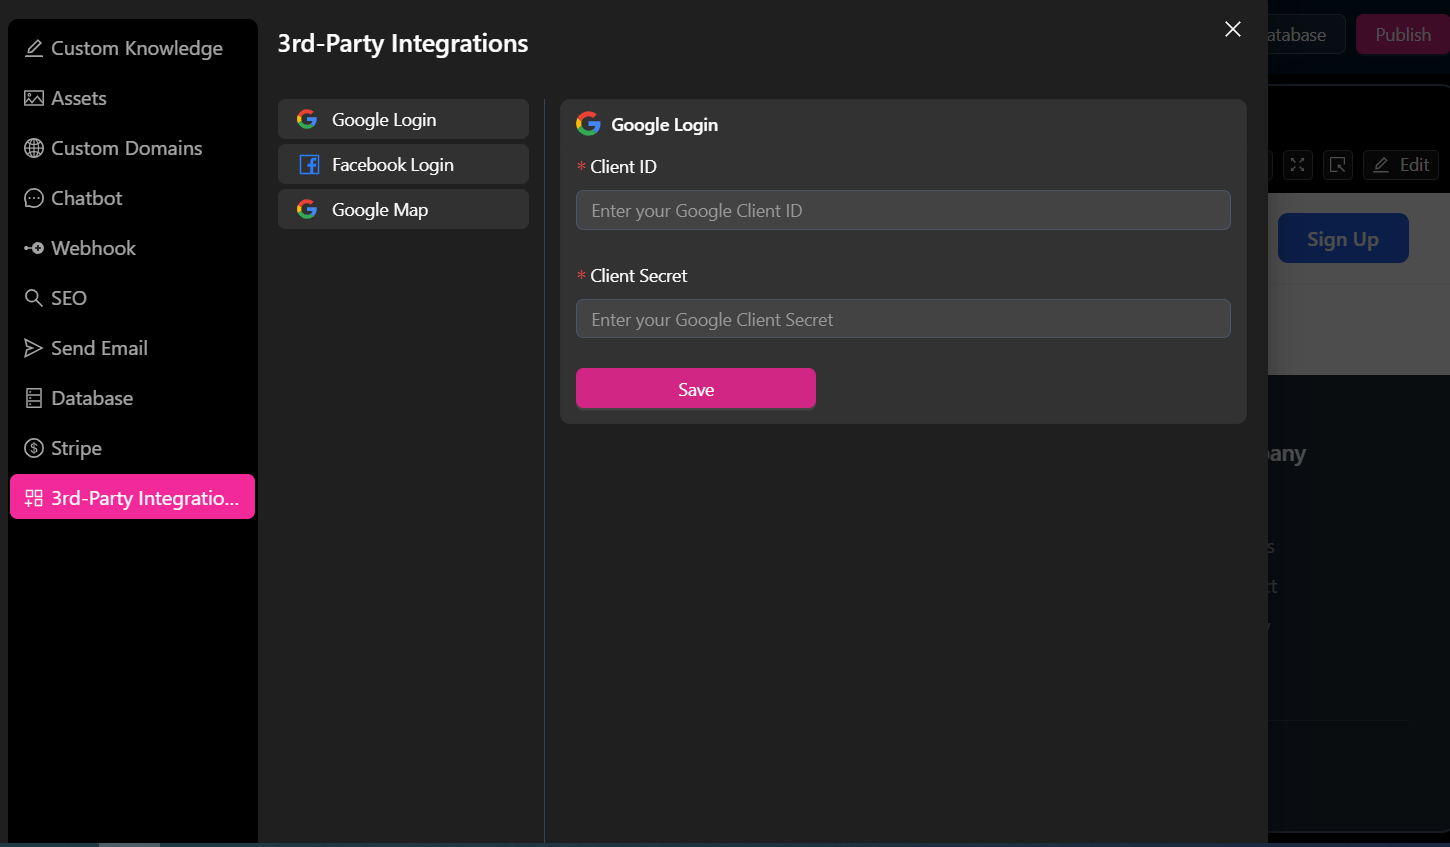
Account Quick Access
You can easily access the following features in account setting at any time:
-
Profile: Manage your profile and preferences with ease, log out of your
ezsiteaccount securely.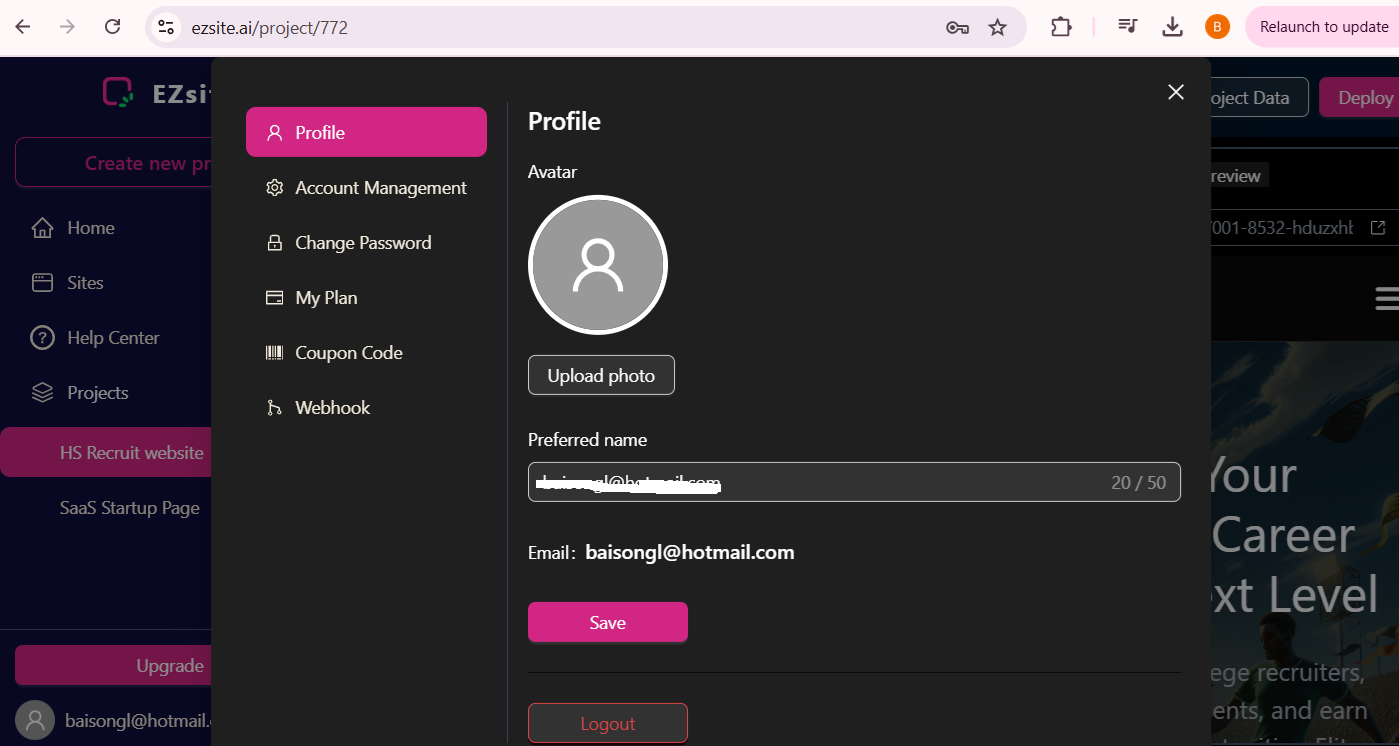
-
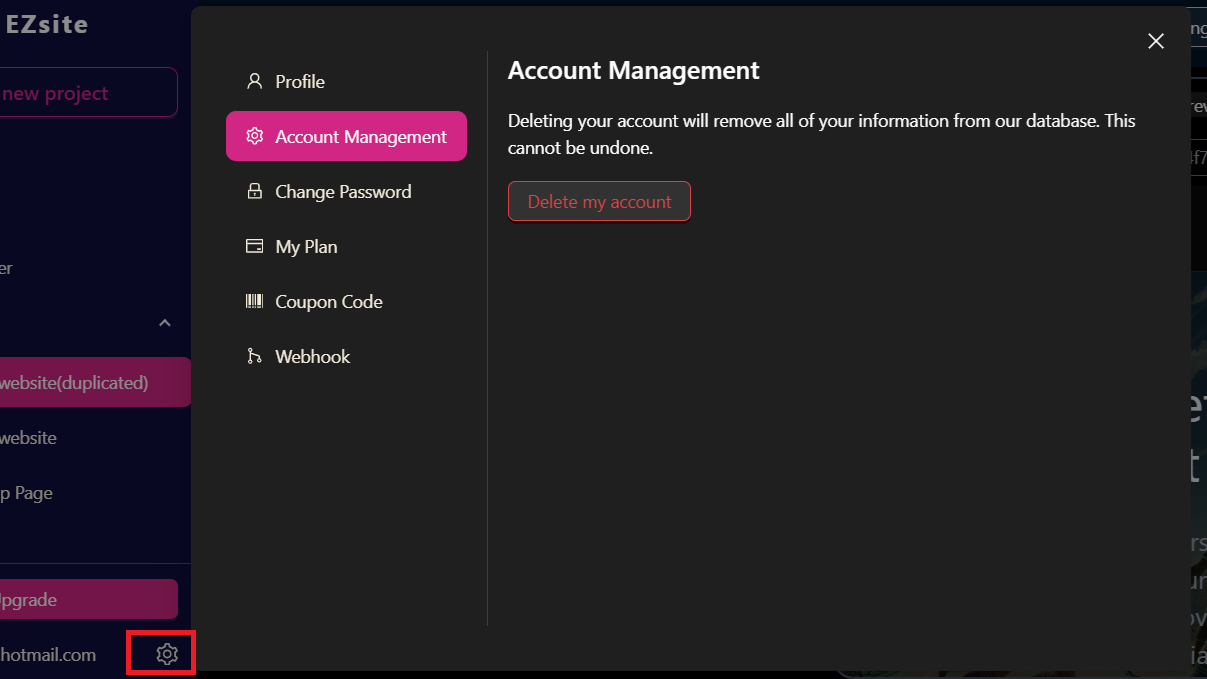
Account Management: Delete your account (⚠️ Danger Zone).
-
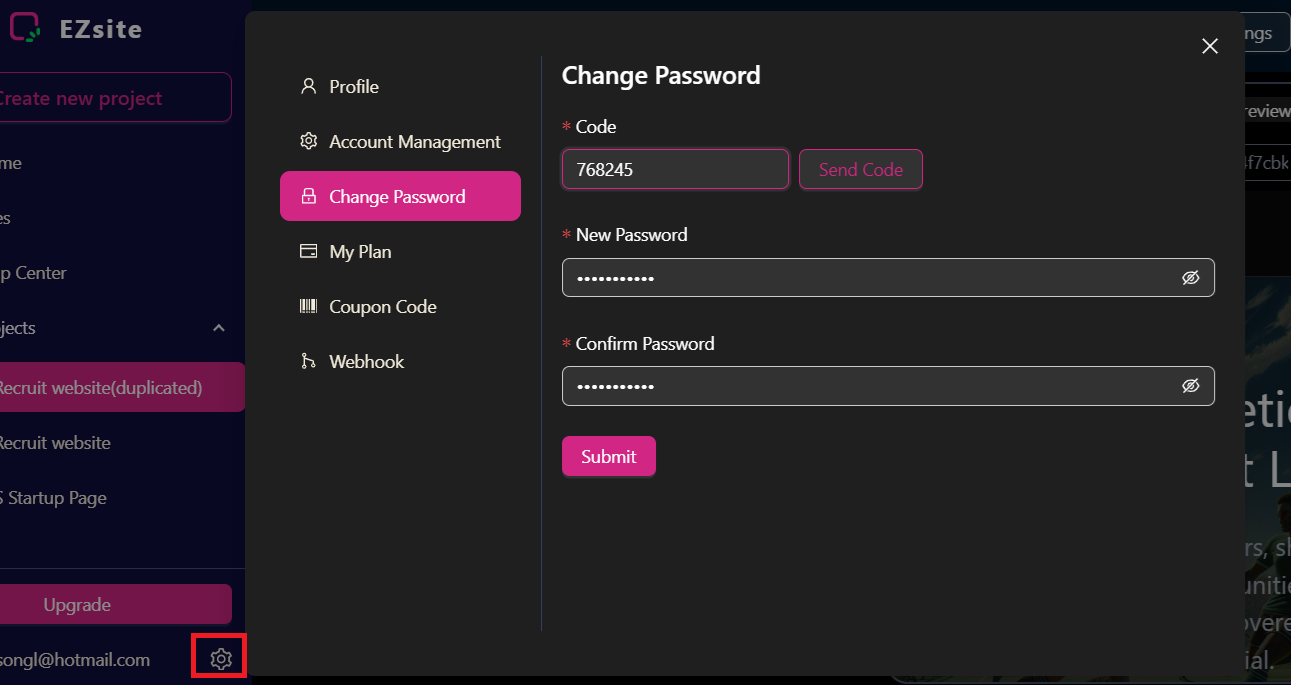
Change Password:
Click the "Send Code" Button: This will send a verification code to the email address associated with your account.
Enter the Verification Code: Once you receive the code, enter it in the designated field.
Set a New Password: Choose a strong and unique password.
Confirm Your Password: Re-enter the new password to ensure accuracy.
Save Your Changes: Click the "Save" button to complete the password change process.
By following these steps, you will successfully update your password.
-
My Plan: This action will direct you to a page where you can upgrade or downgrade your current plan.
-
Coupon Code: If you have a coupon code, you can apply it here to receive a discount on your payment

-
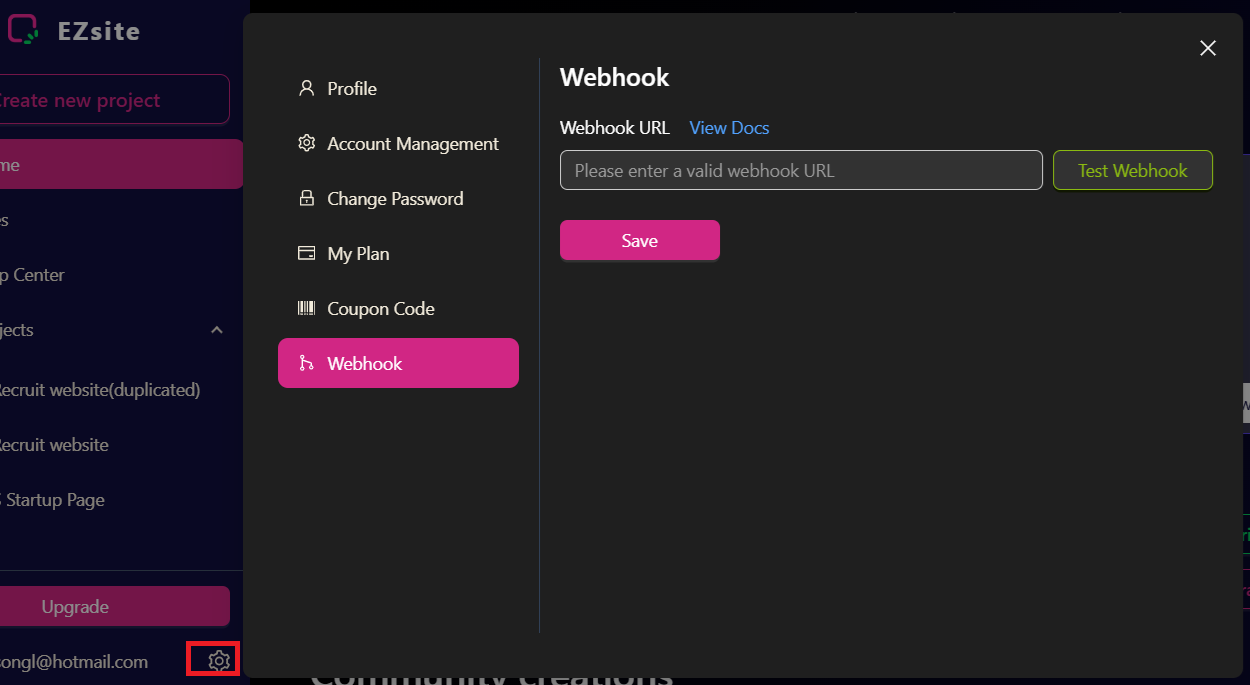
Webhook: You can add your webhook URL to instantly send user-submitted form data to your CRM in JSON format. A detailed document is also available to guide you through the webhook setup process.
START YOUR PROJECT
You can begin using ezsite in several ways, tailored to your preferences and available resources:
Prompt:
-
Our prompt-based system simplifies the process of creating apps.
-
Simply describe what you want to build in the prompt box.
-
The more specific your description, the better the outcome will be.
-
Begin with clear and detailed prompts to achieve optimal results.
-
You can refine and adjust your project as needed throughout the process.
Please refer to Prompt Guide for detail instruction
Templates:
-
-
ezsiteprovides templates for popular project types like dashboards, e-commerce sites, and social apps, allowing you to set up your project quickly. -
After loading a template, use prompts to customize features, add new elements, or refine the design to perfectly align with your vision.
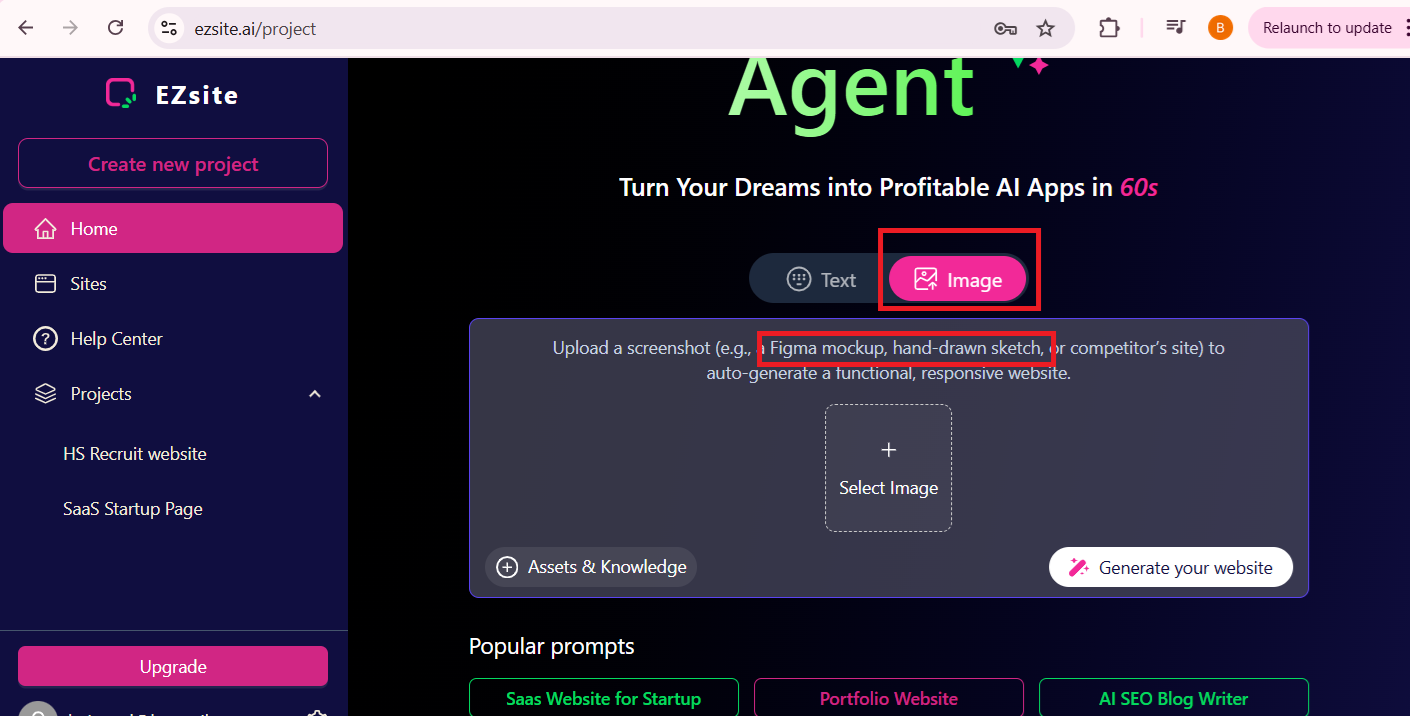
Using images to generate a project:
Capture a screenshot of your design (e.g., a Figma mockup, hand-drawn sketch, or competitor’s site). You can select images from your folder to upload the screenshot directly to ezsite. Once you click "Generate your website" button, ezsite will Convert it into functional, responsive code.
ENHANCE YOUR PROJECT WITH FULL-STACK CAPABILITIES
Database Power
We offer three options for connecting to a database: (Note: Once the database is set up, it can neither be shut down nor have its type changed)
ezsiteDatabase: Click "Enable Database" button, choose "EZsite Database" Database Type, it Leverages our built-in database for effortless data storage and management, requiring no additional configuration.- Supabase Database: Click "Enable Database" button, choose "Supabase Database" Database Type, Connect your own Supabase database to store and manage your application data. Level up with advanced features like subscriptions, real-time updates, and third-party authenticationFor setup instructions, visit: Integration with Supabase
- Custom Database: Click "Enable Database" button, choose "Custom Database" Database Type, You can set up your own PostgreSQL database to Connect and manage external PostgreSQL databases directly, with full SQL query support and enterprise-grade scalability. For setup instructions, visit: Set Up Custom Database
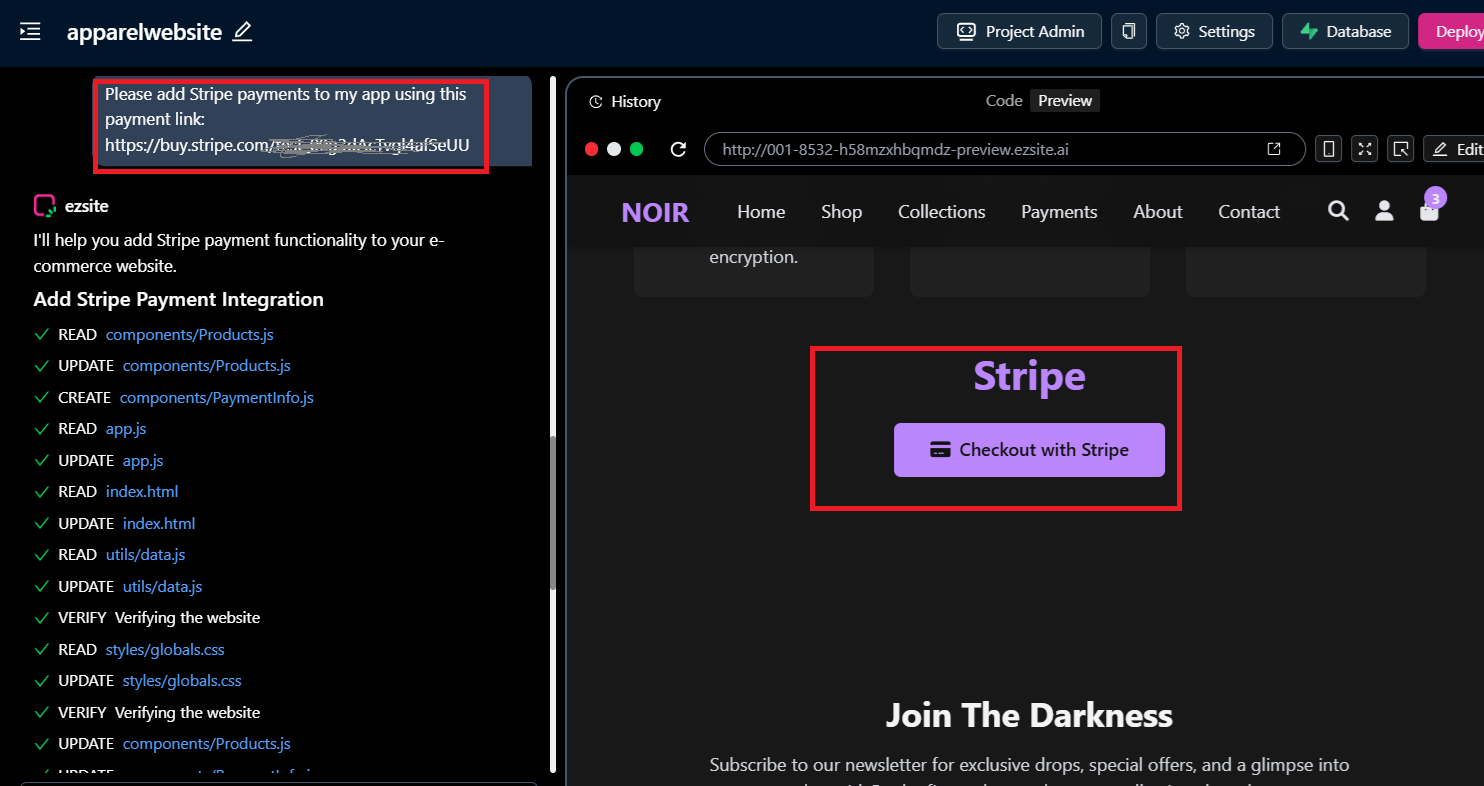
Integrate Payment Capabilities into Your Application
There are multiple ways to integrate Stripe into your ezsite project. The most straightforward way is to use Stripe's built-in payment links for simple and fast checkout.
add Stripe payments to my app using this payment link: [Your Payment Link]
Enhance Your Application with Email Capabilities Using Resend
Resend: is a developer-friendly email API designed to simplify email integration. By incorporating Resend into your EZsite project, you can efficiently send emails. Once set up, your Resend API key will automatically handle the delivery of signup emails, ensuring seamless communication with your users. here is a detail Resend Integration Guide
DEPLOY & PUBLISH YOUR SITE
SEO Setting
To configure SEO settings for your project, follow these steps:
-
Navigate to the "Settings" section on your project dashboard.
-
Click the "SEO" button located on the left side.
-
Fill in the necessary fields in the right panel.
-
Click the "Save" button to apply your changes.
Custom Domain
With ezsite Pro and Premium plans, you can connect your own domains or set up custom .ezsite.host domains for your projects.For additional details, please visit our guide on setting up a Custom Domain
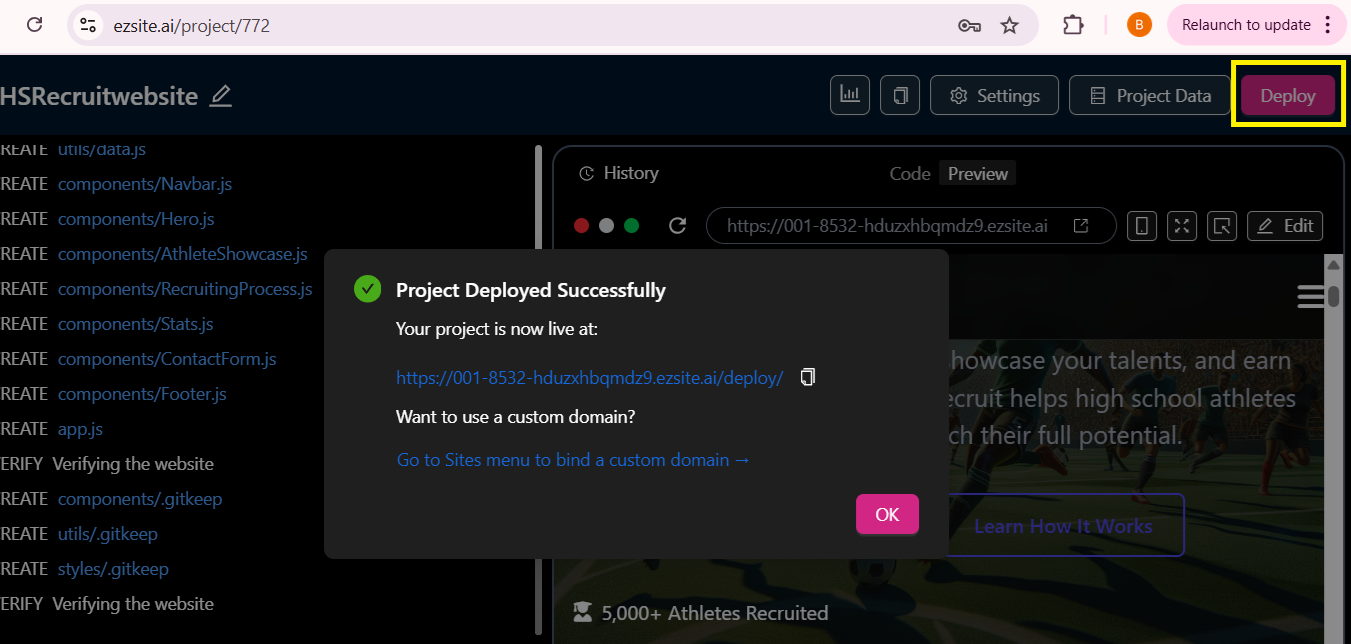
Deploy your project
Once your project is complete, click "Deploy" button to publish it to generate a shareable URL. This allows you to easily showcase your application or share it with collaborators and stakeholders.